

Everything you want to know on delegating your NEAR tokens
Hi Readers👩💻,
Today, we’re having a look at delegating your NEAR digital assets through the official NEAR Wallet. But before we can get started, here’s a quick recap of the NEAR Protocol.
NEAR Protocol — A Quick Recap
The NEAR Protocol, often referred to as NEAR, is a decentralized application platform created to facilitate the future’s web and power its economy. For NEAR, the envisioned future web will have everything from new currencies to applications and, most likely, even whole new industries.
For a big part, NEAR Protocol is based on the same underlying technology like Bitcoin and combines it with advances in community consensus, database sharding, and usability. The protocol prides itself on being built from the ground up to be the most accessible network in the world for both developers and their end-users while still ensuring scalability and security to serve those same users.
Three factors make this possible: building decentralized applications and onboarding users with excellent experience, and scaling applications. By doing so, NEAR is the first-ever community-based network to extend the reach of Open Finance and power the future of the Open Web.
Let’s Get To Delegating! 🚀
If you already have a NEAR account, go directly to Step 2.
Step 1 — Set-Up Your Account
Before you can get started with delegating your $NEAR, you should set-up an account on the NEAR wallet. To do so, you will have to create an account on Mainnet.
The NEAR wallet makes it possible to create contract calls to the blockchain, set-up your local node, and send and receive funds from other users. Whenever you register your Account ID, you have to provide a unique name. Although every wallet has a unique name, every stakeholder can still set-up multiple wallets.
Once you’ve created an account, you can also use it to log into third-party services (somewhat like a Google or Facebook account). However, with NEAR Account IDs, the data is only accessible and manageable by you.
First things first, navigate to https://wallet.near.org/ and select “Create Account”.
In case you’d like to access new features, you can test these on https://wallet.staging.near.org/ (for example, as of October 2020, staking for all types of tokens is only available in staging).
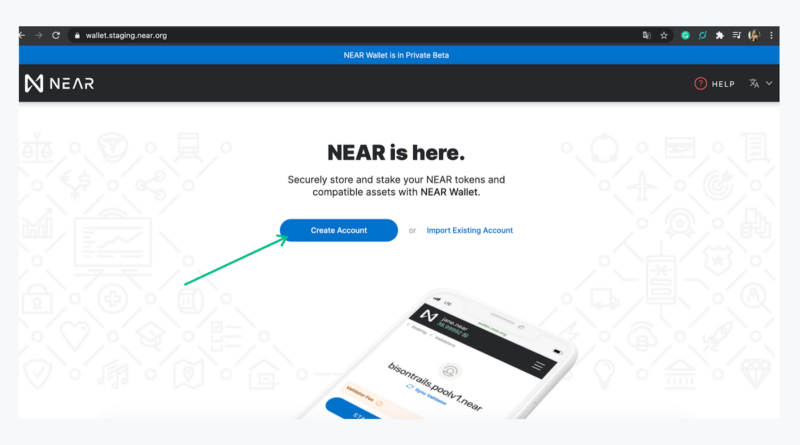
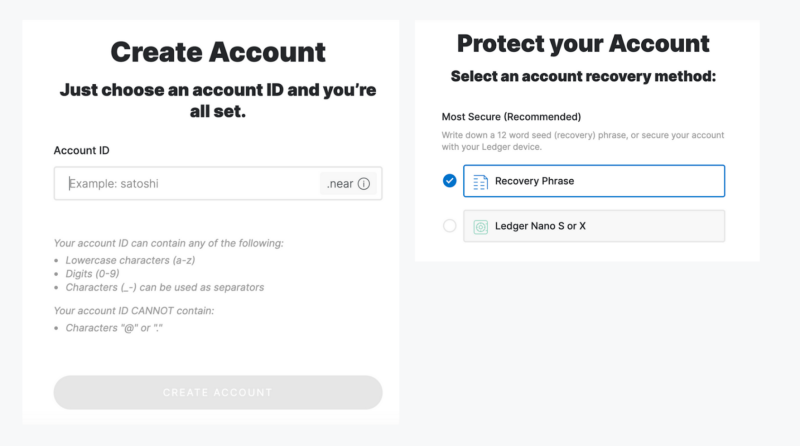
Next, you have to think of an account ID. Fill the form out and select “Create Account”. Next, choose a way that you would like to protect your account. It is possible to select from a seed phrase, connecting your Ledger, or using email or phone recovery. We would recommend using either a seed phrase or your Ledger as these options are more secure. For this tutorial, we are using the seed phrase.
After selecting the seed phrase recovery option, click “Continue”. Make sure to write down the recovery phrase words IN ORDER and keep them safe, preferably offline, or on an external drive. Please keep in mind that you cannot recover your account without them.
After doing so, select “Continue” once again. Next, you will see your account name, and you will have to send at least 3 NEAR to your account to continue. Once you’ve received the NEAR, you can select “Continue” (see image).
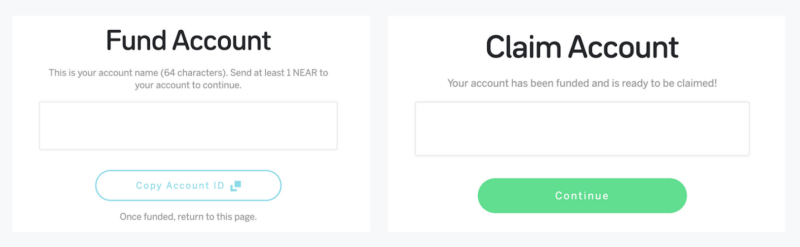
On the next page, you will be asked to restore your account. Please start this process by selecting: “Continue”. Wait a couple of seconds, and your wallet will open up. Your dashboard should look similar to the image below.
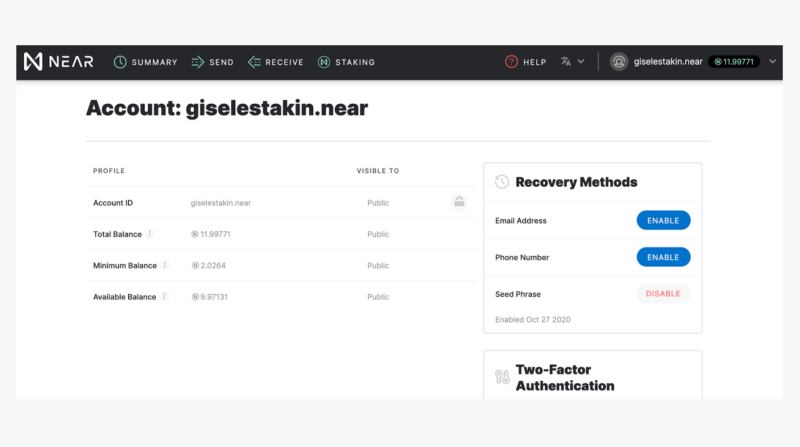
Congratulations!🎉 You have now set-up your account.
Step 2 — Recover Your Account on Mainnet
In case you already have a Mainnet Wallet you can also navigate to wallet.staging.near.org and select: “Access Your Account”. Then, choose your recovery method — we have chosen Seed Phrase Recovery, and select “Recover Account” (see image below).
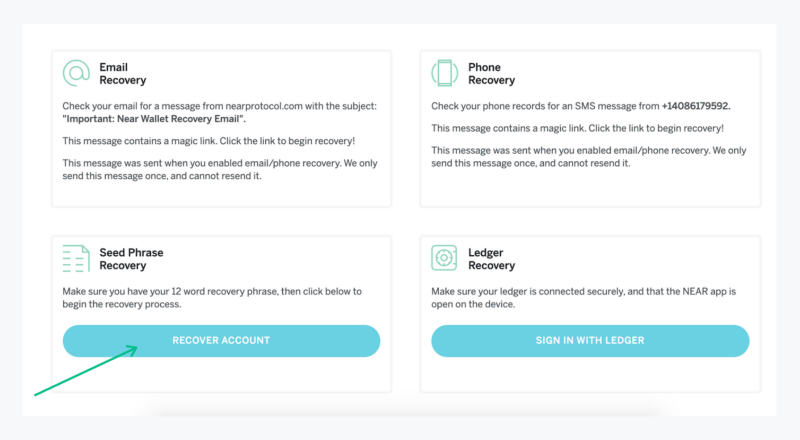
Enter the backup phrase that you’ve written down when you created the account. Once you’ve recovered your account or created a new account, you’re ready to get started with staking.
Step 3 — Let’s Stake!
If you’d like to start with staking, go to the “Staking” button in the navigation bar in the dashboard (or dropdown menu on your mobile phone). Click on: “select validator” and choose the validator of your liking.

A pop-up will ask you to confirm your choice, and then select: “stake with validator”.
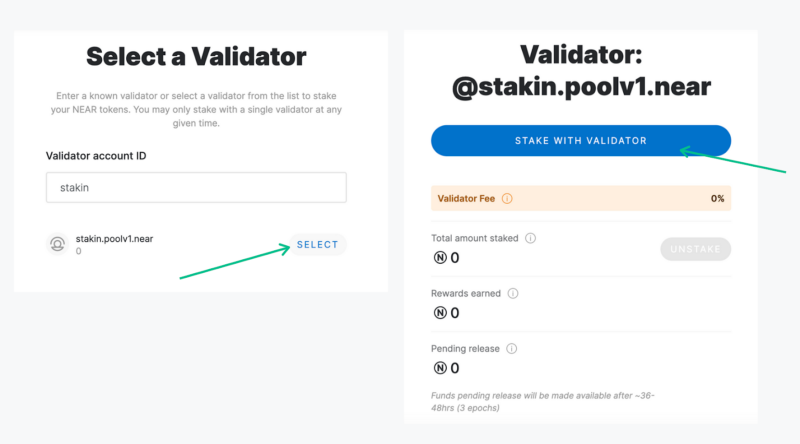
Enter the amount of NEAR you would like to stake, click “Submit Stake” You will need to confirm two transactions,o select the validator, and deposit and stake with the validator.

If you’d like to use Stakin as your validator, you can use the following address: stakin.poolv1.near
- To see all transaction on the NEAR Protocol, visit: https://explorer.mainnet.near.org
CONGRATULATIONS! You’ve now staked your $NEAR🎉!!
Step 4 — Unstaking
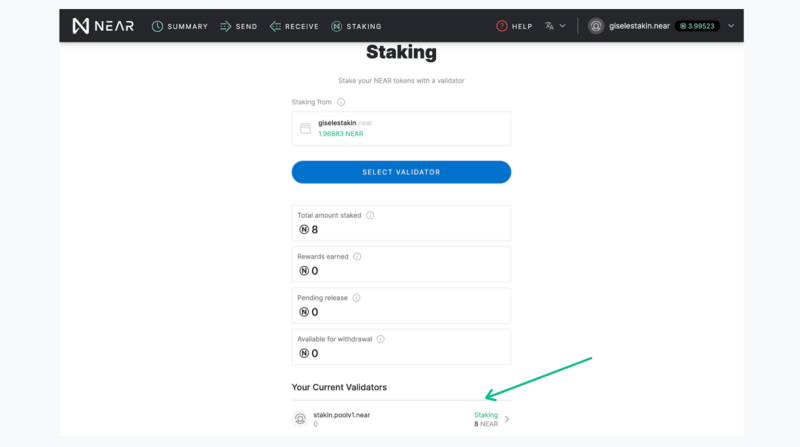
If you’ve changed your mind or simply would like to unstake your $NEAR, go to the staking dashboard by clicking on: “staking” in the top menu and select your current validator.
Select “unstake” and confirm the transaction.
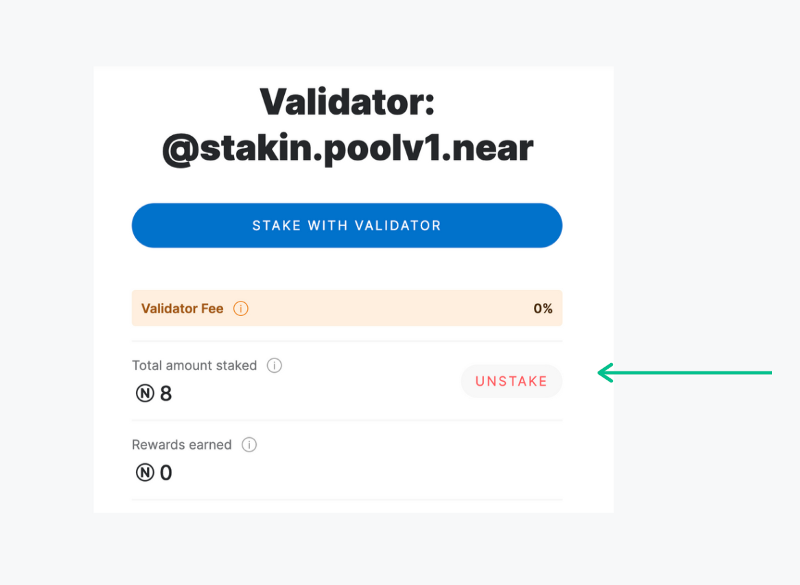
It will take 36 to 48 hours (3 full epochs) to unstake your assets, after which you will be able to withdraw your stake. To do this, return to the validator page and click “withdraw”.
Please note, for you to be able to withdraw on the validator page, you must have about 0.3 $NEAR tokens for transaction fee in your wallet. With this amount, you are able to withdraw back to your wallet.
DISCLAIMER: This is not financial advice. Staking and cryptocurrencies investment involves a high degree of risk, and there is always the possibility of loss, including the loss of all staked digital assets. Additionally, delegators are at risk of slashing in security or liveness faults on some PoS protocols. We advise you to DYOR before choosing a validator.
Join the conversation