

Using Your Yoroi Wallet — This Is How You Delegate on Cardano
Hi Readers,
Recently, Stakin has become a part of the Cardano ecosystem. And thus, we figured it was time to help you with a step-by-step guide on how to stake your $ADA. But before we do that, let’s have a quick look at what Cardano is.
Cardano is a decentralized third-generation proof-of-stake blockchain that has been designed with a focus on sustainability, scalability, and transparency. Furthermore, it is a fully open-source project that aims to deliver an inclusive, fair and resilient infrastructure for financial and social applications on a global scale. Compared to other PoS networks, Cardano is the only one to put such a strong emphasis on academic research, peer reviews and formal verification of each feature and specification. 100+ research articles have already been published.
For more information, have a look at the video below.
Let’s Get To Staking!
Now, with that said, let’s get started with staking. For this tutorial, we will be using the Yoroi Wallet. So, let’s start by setting up your wallet.
First, visit https://yoroi-wallet.com/ and select “Download”. The Yoroi Wallet is available for Chrome, Edge, Firefox, Android and iOS. For this tutorial, we use the Chrome extension. Once you’ve installed the extension, open it up to get started. Select the language of your choice and select “Next”.
Now, you will have the option to use the simple or advanced version of the Yoroi Wallet. Select the option that best fits your needs. In this case, we will be using the “simple version”.
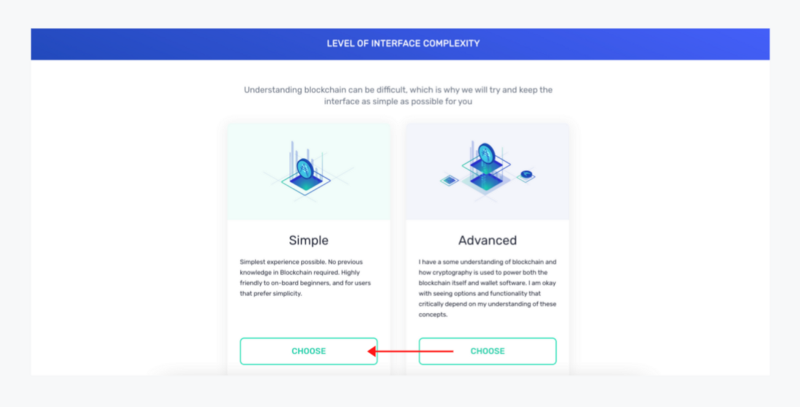
Click on “Choose” to continue. Next, allow or skip the option to let Cardano enable payment URLs. These URLs can be used to share info with your friend if you’d like to. Remember, Cardano or the Yoroi Wallet will never just share any of your data without your consent nor do they store it.

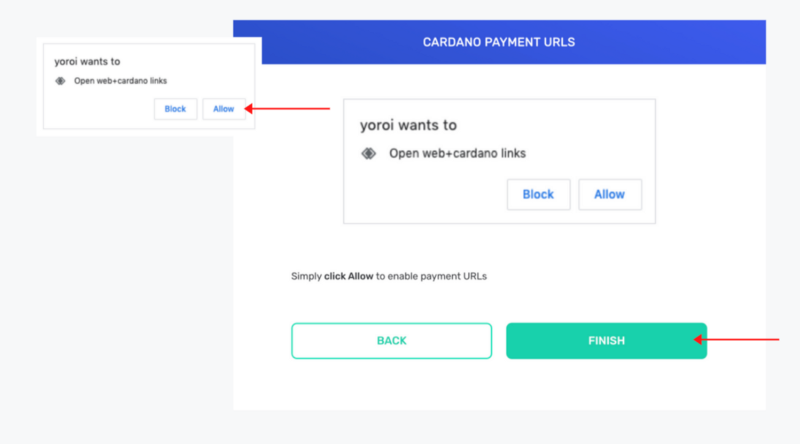
Next, you will need to make sure that Yoroi has access to the open web and Cardano network. Select “Allow” in the pop-up to continue. Next, select “Finish” to finalize the process.
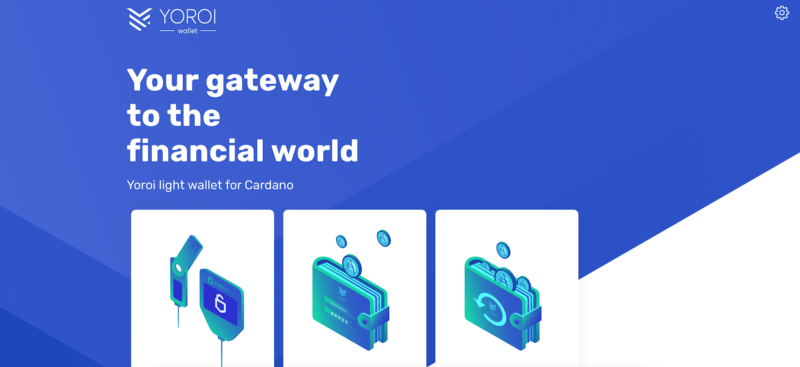
If everything has gone right, you should now see a desktop similar to the one below.
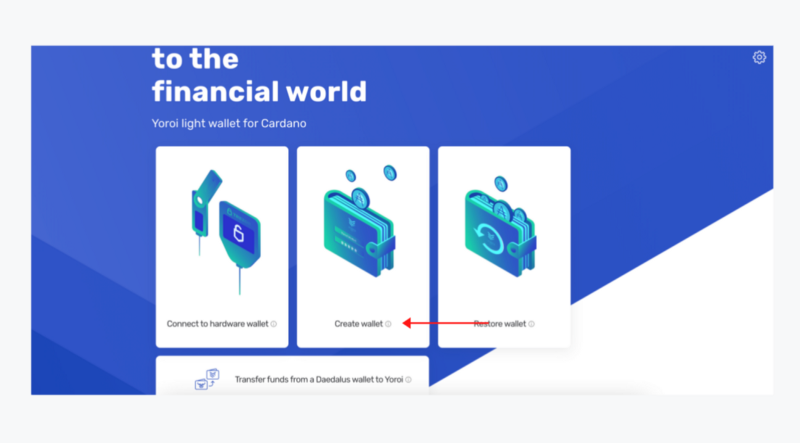
Scroll a bit down and select “Create a wallet”, “Connect a wallet” or “Add hardware wallet” to continue. In this case, we will be creating a new wallet.
Select “Cardano” in the next pop-up. Then, select “Create Wallet” once again.

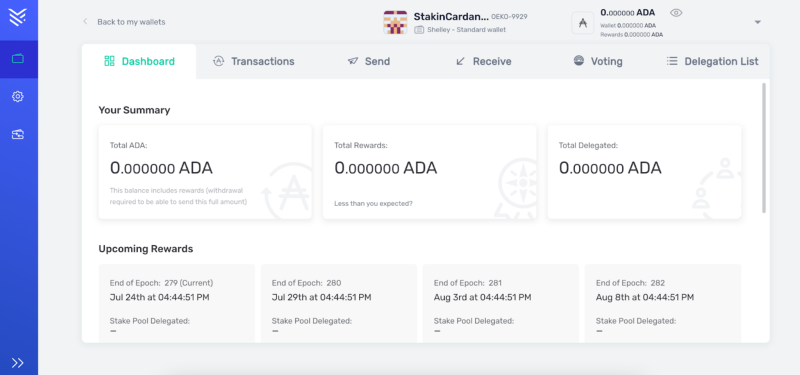
You will now be asked to fill out your wallet name, password and confirm. Next, make sure you write down the seed phrase somewhere safe and get ready to fill it out once you’ve written it down. After that, you are good to go. If you choose the simple version, your dashboard should look like the one below.
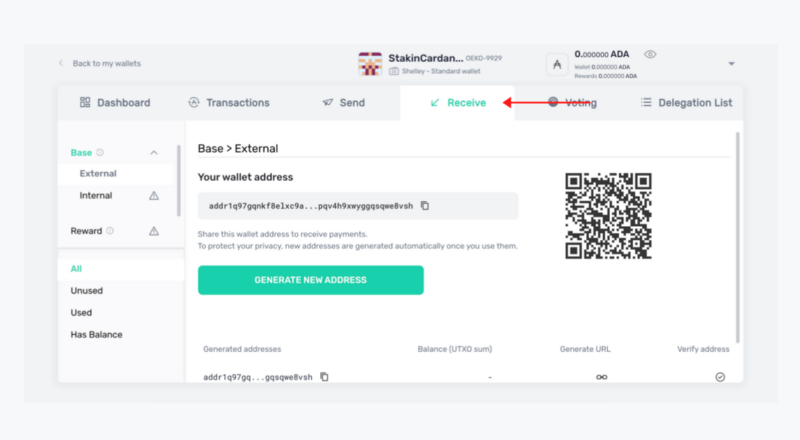
You will now need to make sure that you have your $ADA assets in your account before you can start staking or delegating. Thus, in the top menu select “Receive”. Copy the wallet address or scan the QR-code to transfer assets from any other wallet or exchange to your Yoroi Wallet.
Staking/Delegating
Once you have your assets in your account, it’s time to delegate them to a pool. Once again, on the top menu, select “Delegation List” on the far right. Scroll through the pools and select the one of your choices, or add the ticker name to find your preferred pool right away.
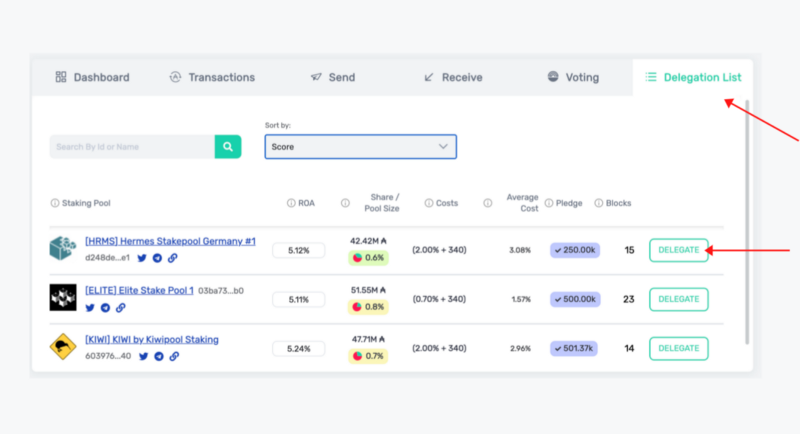
Select “Delegate” on the right side of the pool name, to delegate your assets.
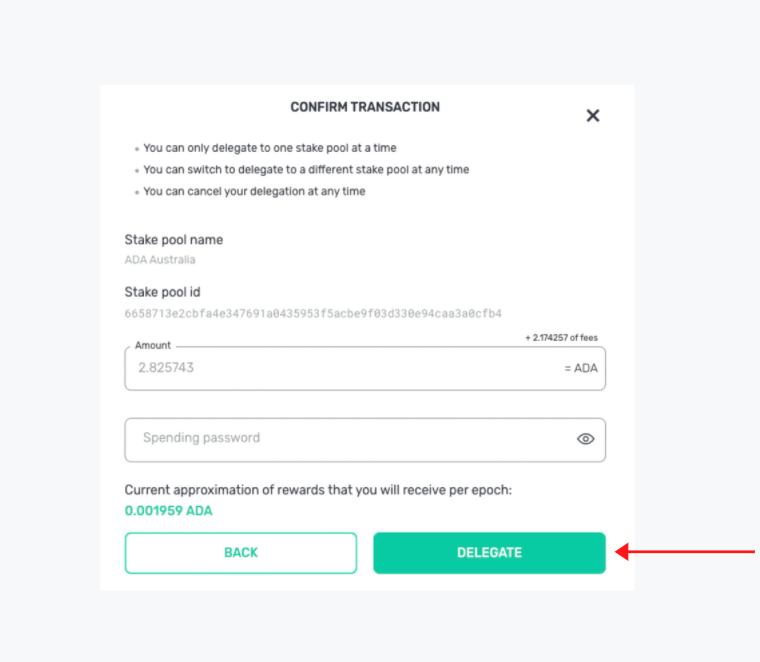
Fill in the amount you’d like to delegate as well as your password and select “Delegate”.
And that’s it! You have now delegated your $ADA!!!
DISCLAIMER: This is not financial advice. Staking, delegation, and cryptocurrencies involve a high degree of risk, and there is always the possibility of loss, including the failure of all staked digital assets. Additionally, delegators are at risk of slashing in case of security or liveness faults on some protocols. We advise you to do your due diligence before choosing a validator.
Join the conversation