

Step-by-step explanation about staking $BLD with Keplr Wallet. Stake Agoric $BLD. Your Trusted Crypto Rewards with Stakin.
In this article, we'll take you through staking Agoric's $BLD using Keplr Wallet. Agoric is a smart contract platform built on the Cosmos SDK with Ignite's Proof-of-Stake (PoS) mechanism and a native asset to secure the network. To learn more about Agoric, visit our Introduction Guide.
So, what's $BLD? Well, $BLD is the native digital asset of two tokens in Agoric's network. It's used for securing the network through staking and governance participation.
Setting Up Your Keplr Wallet
- To get started, go to: https://wallet.keplr.app/ to download the Keplr extension.
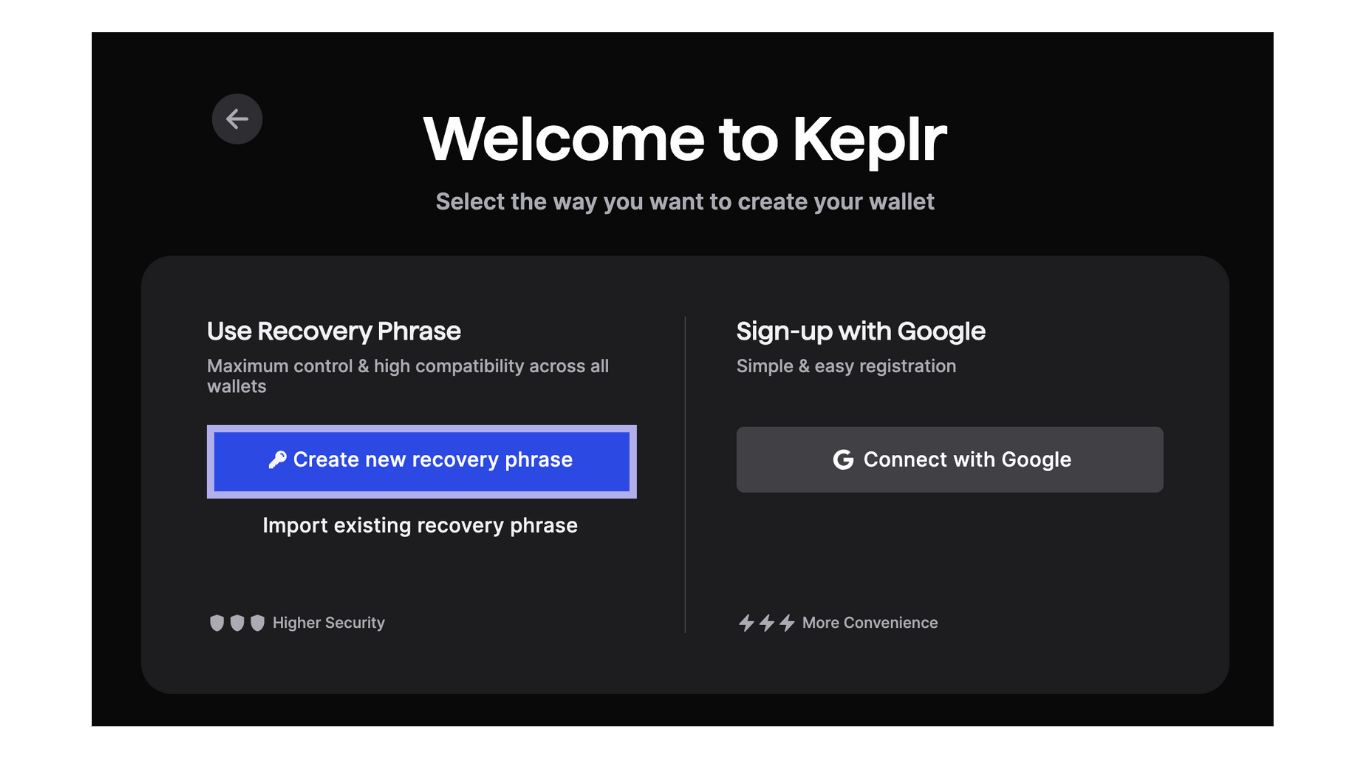
Once ready, open the page. Select "Create a new wallet" to start setting up your account. If you already have a Keplr wallet, select "Import existing wallet."

If you've selected "Create a new wallet", Keplr will ask you to select a new recovery phrase or to connect with Google. In this guide, we'll use the Recovery Phrase.
Remember to store your recovery phrase securely offline and never share it with anyone. If you lose your recovery phrase, you will lose the assets within the wallet.
Once you've copied your seed phrase, fill out your account name and desired password and confirm by selecting "Next".
To confirm, you will be asked to give a few words of your seed phrase. Fill out the request words and select "Register".
You're Keplr wallet is now ready. Go to: https://wallet.keplr.app/ to continue.
Start Staking Agoric $BLD
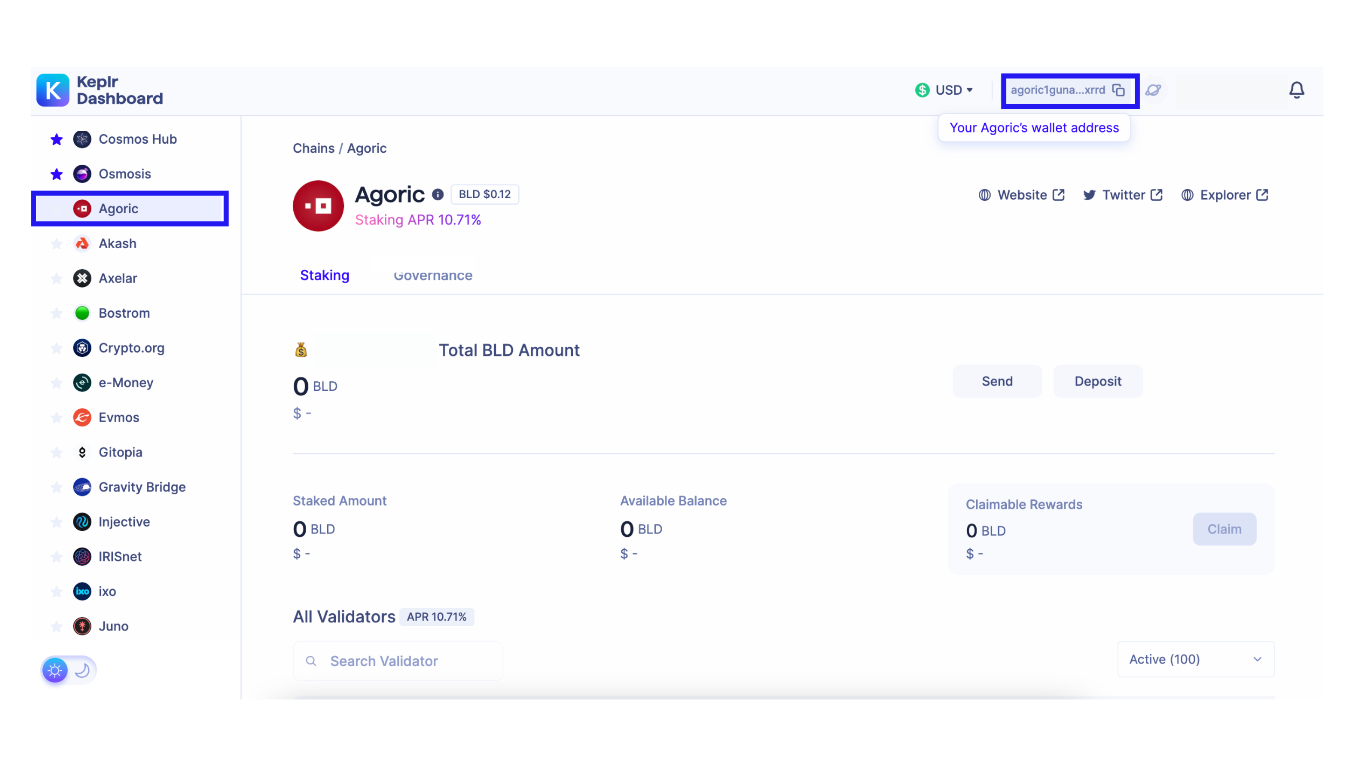
Deposit $BLD by selecting "Agoric" on the Keplr Dashboard's left menu (see image below) and copy your Agoric wallet address on the top right.
Once you have funded your wallet, you can start staking.
On the Keplr dashboard left drop-down menu, select Agoric. Double-check that you're in the "Staking" tab. You should be able to see an overview of your staked assets, the total $BLD amount in your wallet, and the available balance.
Next, scroll down to see the list of all validators. You can select by typing the name of your preferred validator in the search bar or by scrolling down.
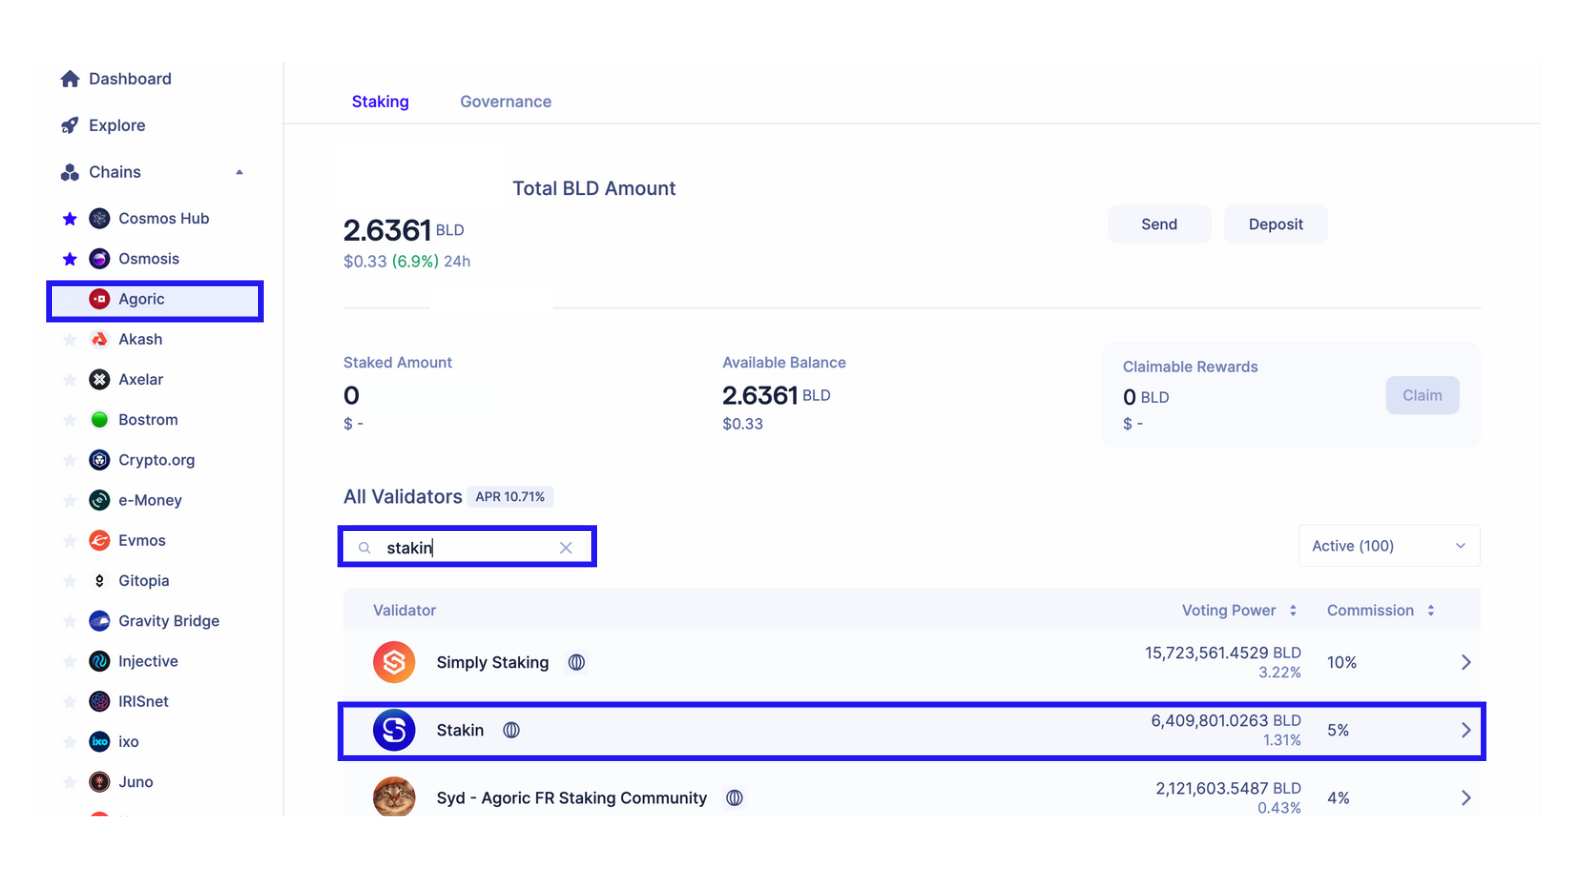

Next, click on the validator to start delegating. A pop-up will appear where you can delegate, redelegate (if you already delegated earlier), or undelegate (if you'd like to stop staking).
Keep in mind that staking your $BLD means they will be locked for 21 days, during which you won't be able to access those staked assets.

In the pop-up, select the amount you'd like to delegate (keep some $BLD for transaction fees) and select "Delegate". Confirm the transaction and add a memo if desired; next, select "Approve" to finalize the transaction.
Congratulations!! You’ve now staked your $BLD!!
You can track your transaction via https://bigdipper.live/agoric/. To optimize your staking rewards tracking activities, you can also use Stakin's non-custodial dashboard. Go to dashboard.stakin.com to give it a try!
DISCLAIMER: This is not financial advice. Staking, delegation, and cryptocurrencies involve a high degree of risk, and there is always the possibility of loss, including the failure of all staked digital assets. Additionally, delegators are at risk of slashing in case of security or liveness faults on some protocols. We advise you to do your due diligence before choosing a validator.
Join the conversation