
A step-by-step guide, written by Stakin on how to use your Keplr Wallet and Ledger Nano S to stake $CRO Crypto.org's native asset.
In today’s blockchain landscape, a bit of extra security is never a bad idea. Hardware wallets provide an additional layer of security against cyberattacks, phishing sites, and viruses. That said, Keplr Wallet offers the option to connect with your Ledger Nano S. In this article, we’ll be explaining step-by-step how to set up your Ledger Nano S for Keplr and how to stake your $CRO afterward.
Let’s Get To Staking!
Step 1 – Install the wallet extension
If you haven’t downloaded the wallet yet, go to https://wallet.keplr.app/; a pop-up will appear as soon as you enter the website. Click on the pop-up; it will lead you to the Chrome extension store. Select: “Add to Chrome”.
Once you’ve added the extension, click on it on your screen’s top-right menu to open the Keplr web page.
There are some important things to note before connecting your Ledger. First, ensure your Ledger Live App and Ledger software are updated to the latest version. If not, you must select “download update” at the top of the Ledger Live App before getting started. Wait until the app lets you “install updates”. After the update, the app will reopen, and you will need to add your password and connect your Ledger once again to continue.
- Link to the Ledger Live App for iOS: https://apps.apple.com/us/app/ledger-live-crypto-wallet/id1361671700
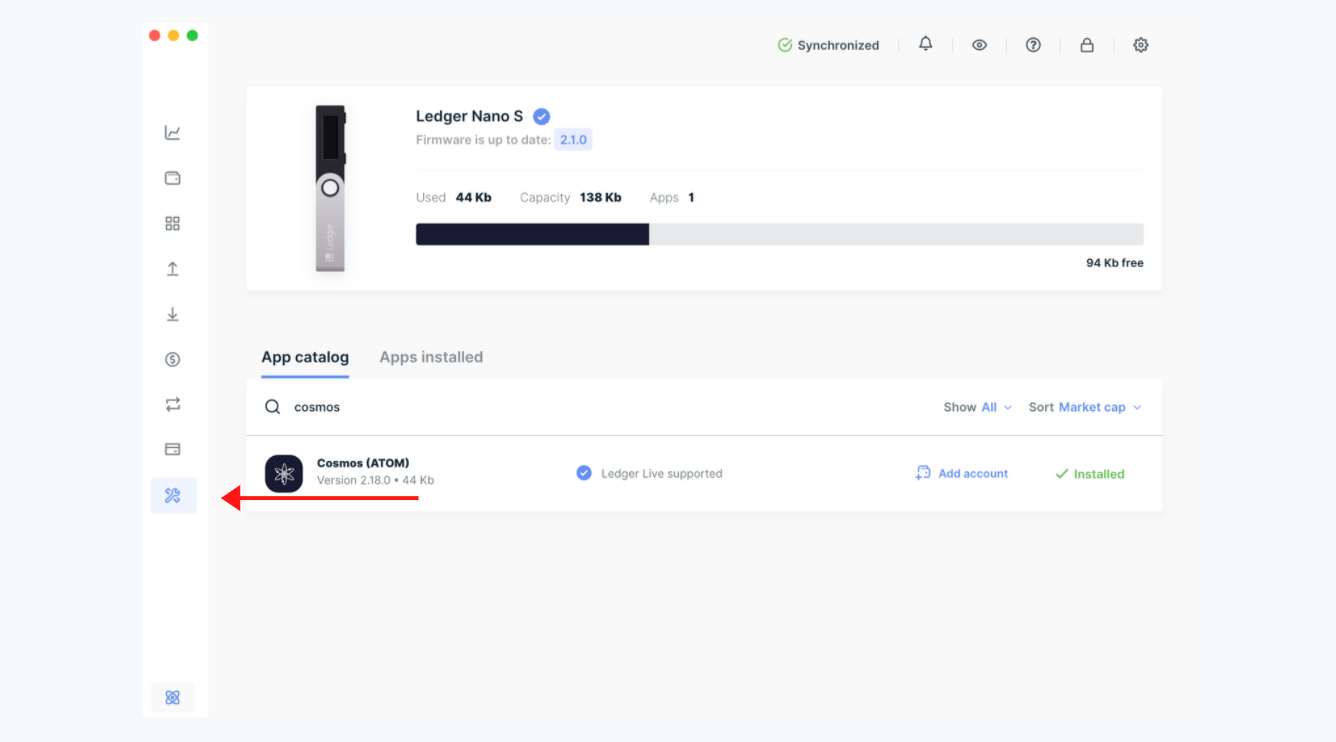
Next, ensure you have the latest version of the Cosmos App installed on your Ledger Device (see image below). Due to Keplr’s default settings, the coin type is 118 (Cosmos Hub) with Ledger, thus why it is recommended to use the Cosmos App. Once connected to Keplr, you can select the Crypto.org blockchain in the drop-down list.
Open the Ledger Live App, and connect your Ledger. On the left menu, select “app manager” (see image below). In the app manager, select “Cosmos”. If this is your first time using the app for Cosmos, go ahead and install it. If the Cosmos app is already installed, double-check on the right side if any updates are needed. If not, you are good to continue.
Please note: if you are experiencing any troubles with Firefox, Ledger recommends connecting using Chrome instead.
Be sure to close your Ledger Live App before connecting with Keplr, as it can conflict.
Step 2 – Import Your Ledger
Now it’s time to connect your Ledger. First, connect your Ledger device to your computer and open the Cosmos app. Your Ledger device should display: “Cosmos ready”.
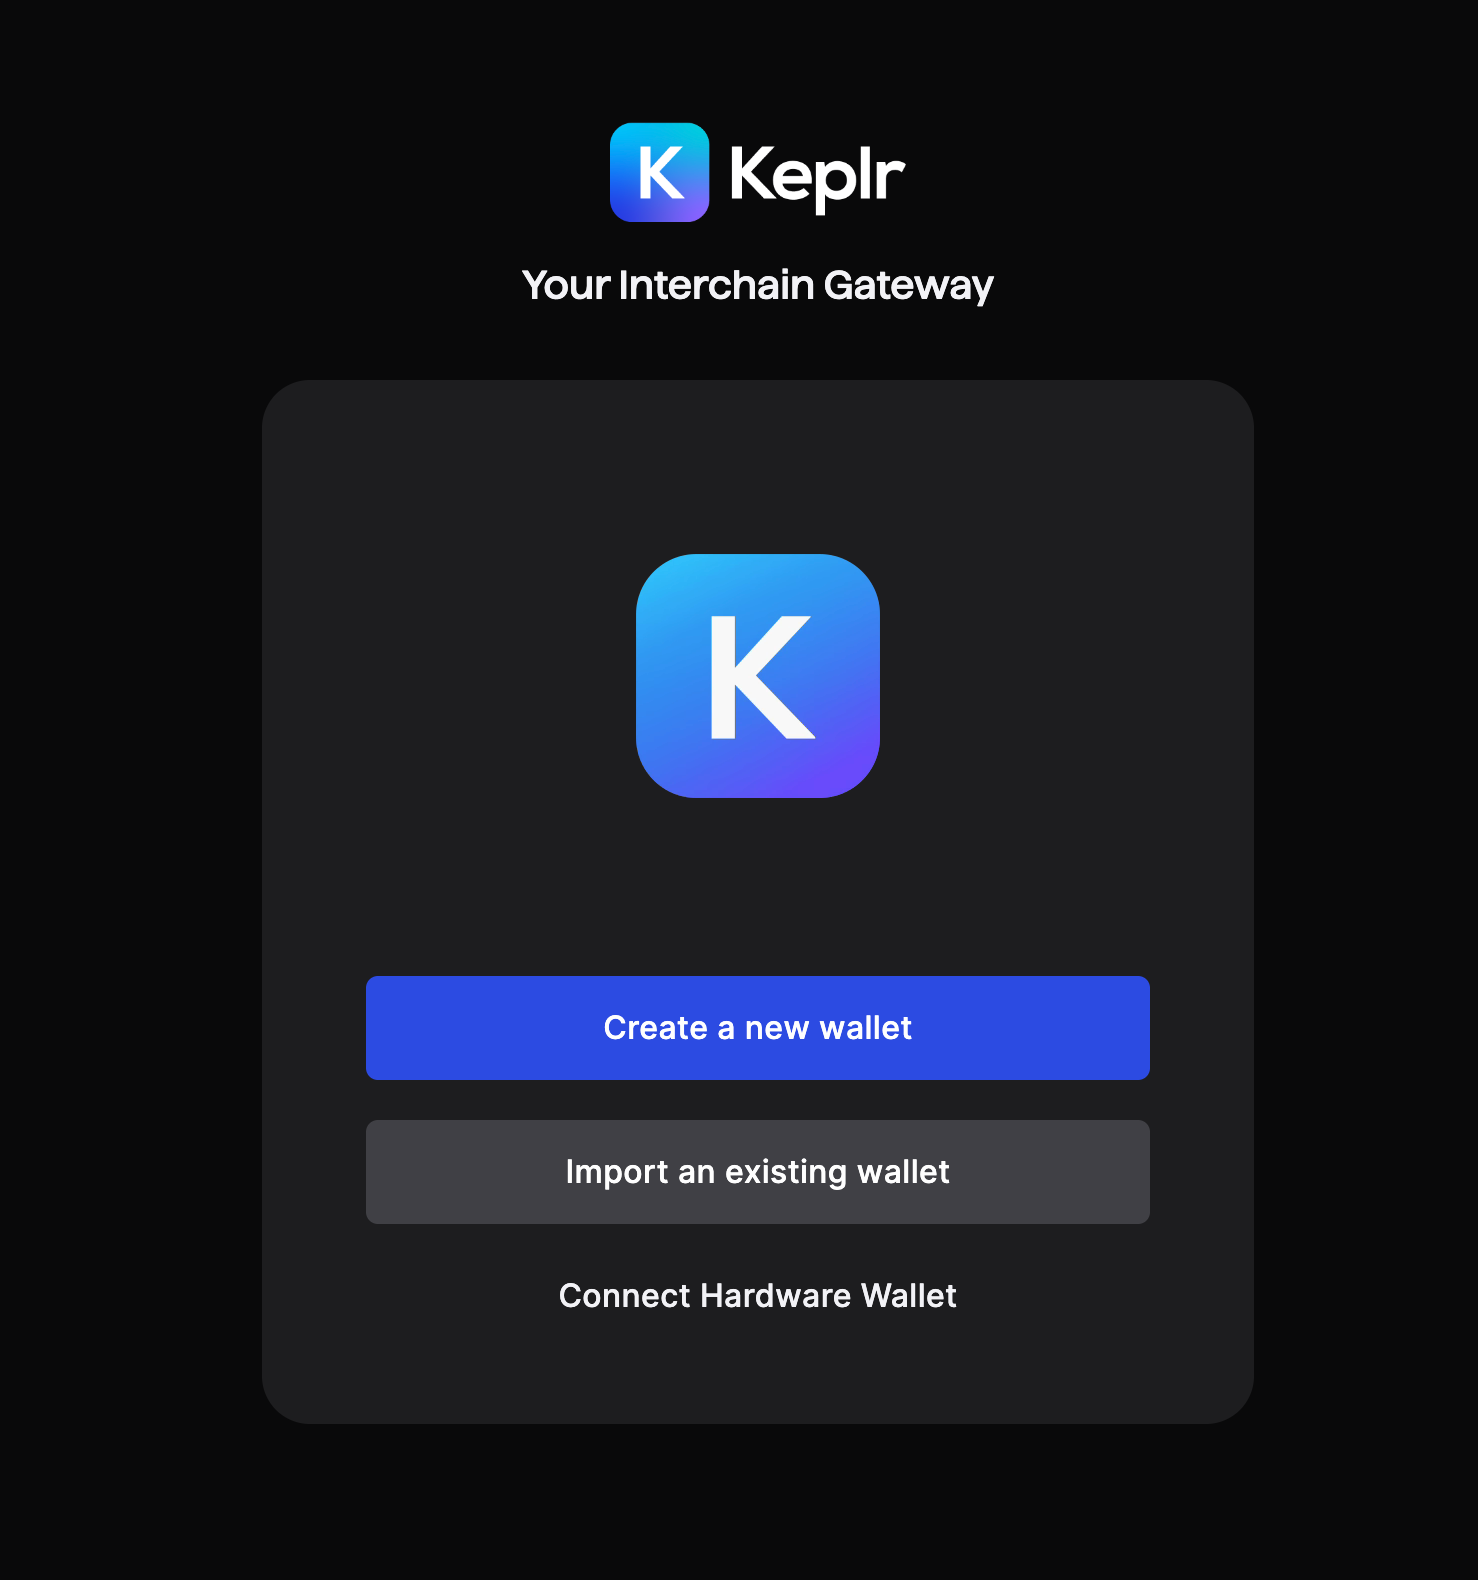
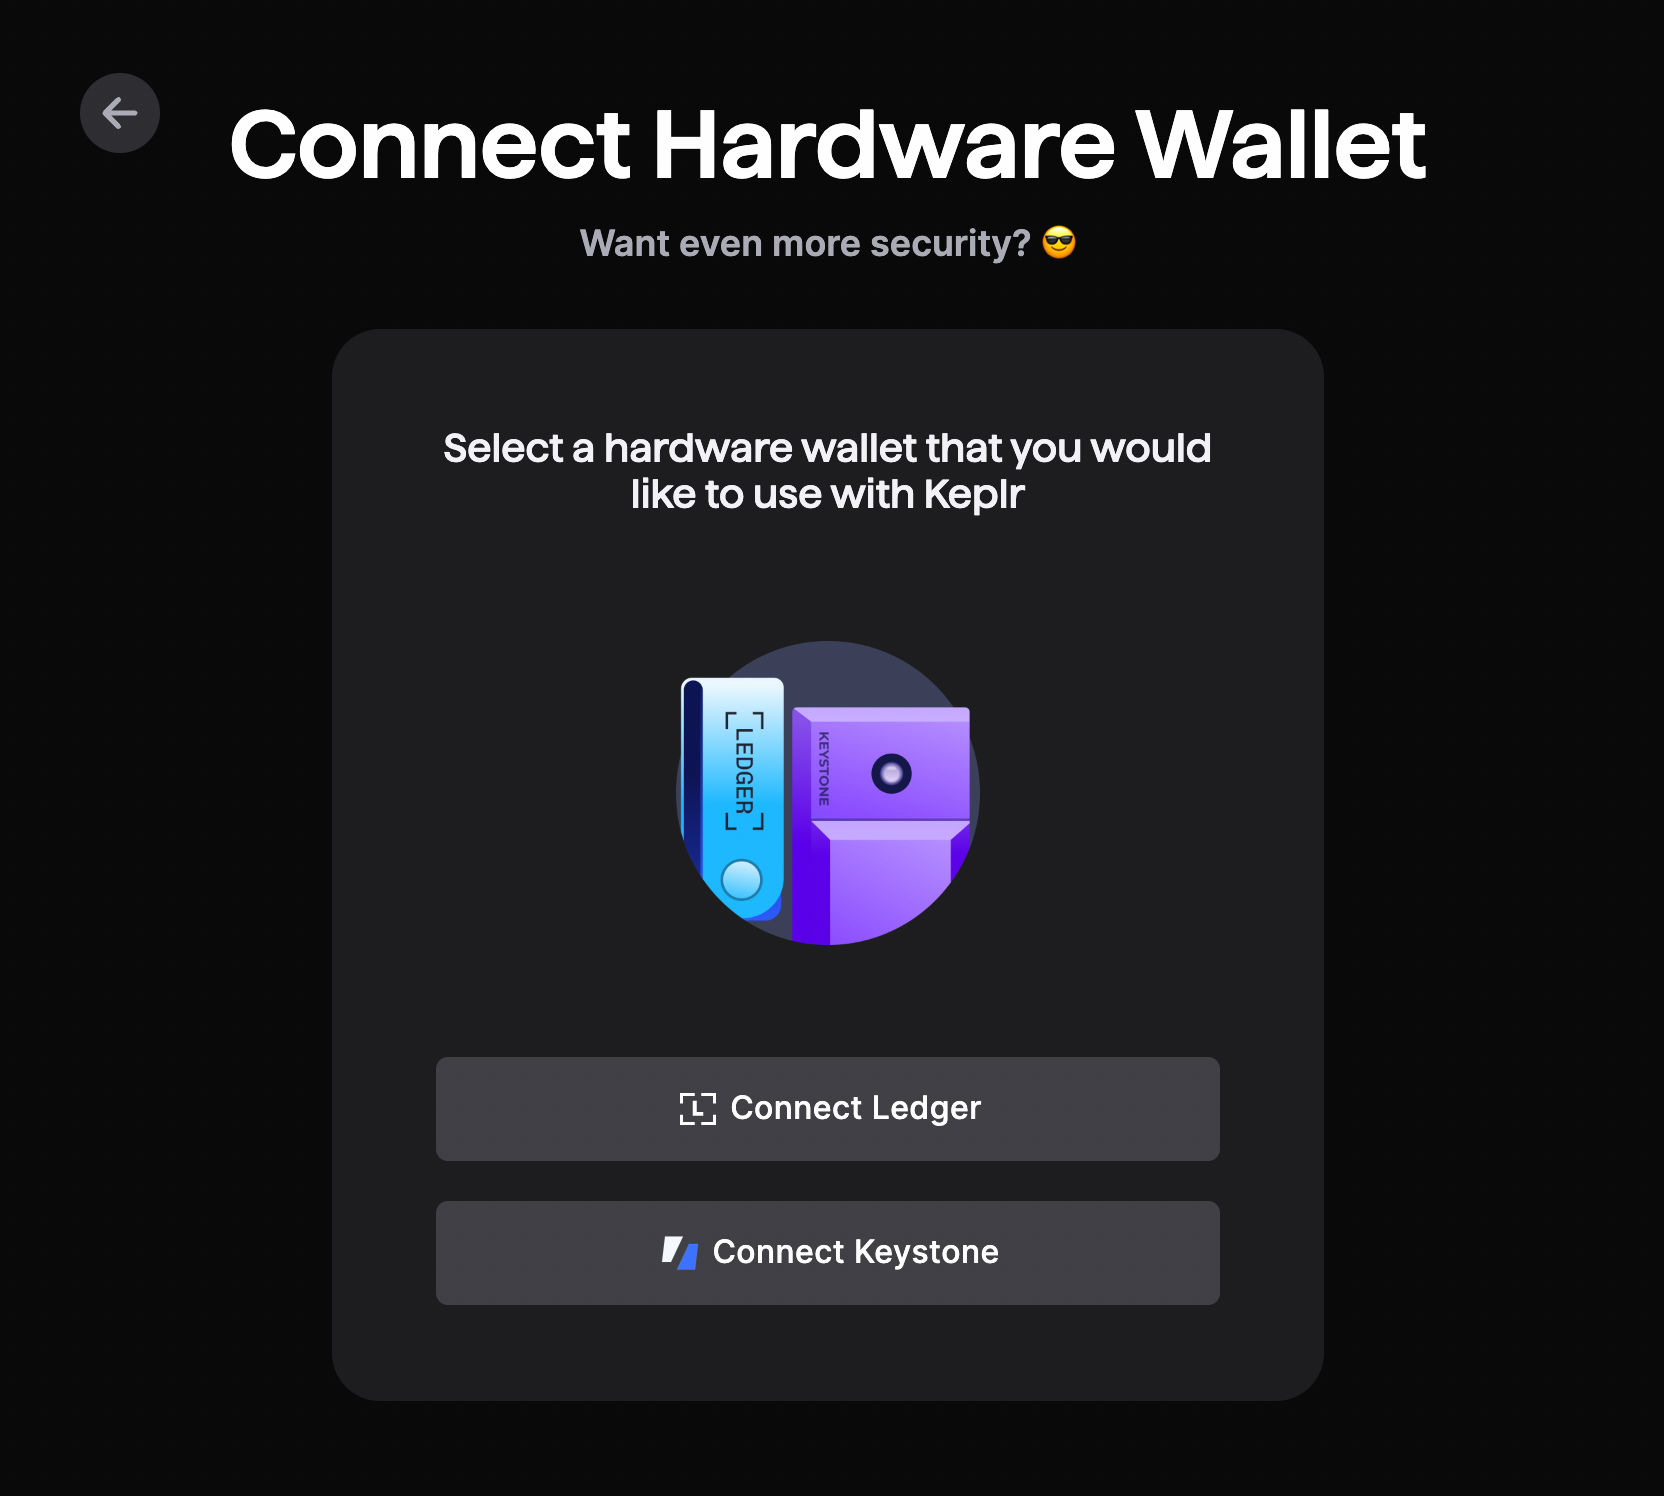
Click on the Keplr extension in your browser and select “Connect Hardware Wallet”. If you already have an account, go to “Select Account” and click on “Add account”. Thereafter, you can select “Connect Ledger” on the Keplr wallet account set-up page (see image below).
Fill out your account name. You will now be asked to confirm via your Ledger. Make sure your Ledger and Cosmos apps are open and connected. Select “Next” and confirm.

If successful, you will now see “You’re all set”. Select “Done” to continue.
You have now successfully connected your Ledger with the Keplr wallet.
Step 3 – Fund Your Wallet
Without funds, there’s simply no way to stake any assets. So, there are a few ways to go about this. First, send your $CRO from any other Cosmos wallet to your Keplr Ledger address. Second, purchase $CRO from any exchange and send it to your Keplr Ledger wallet. Finally, it is also possible to swap $CRO using Osmosis Zone.
- For a comprehensive guide on how to use Osmosis, please have a look at the article below.
 Gisele Schout
Step 4 – Time To Stake!
Once you have funded your wallet, you are ready to get staking! In the app, select “Stake”. The Keplr web app will open itself.
Before continuing with any other steps, please be sure to check if you have the correct URL: https://wallet.keplr.app/#/crypto-org/stake
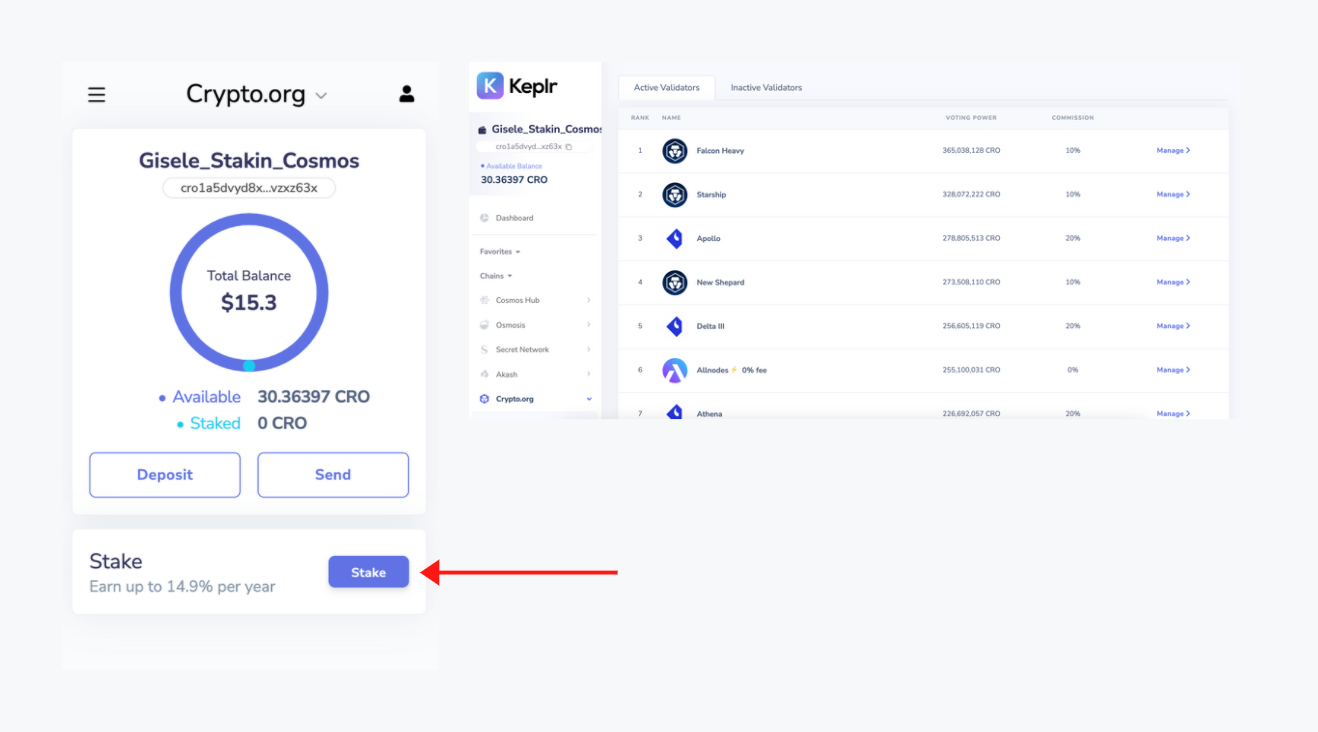
Add your preferred validator's name into the search bar or scroll down to select the validator of your choice. Once you’ve found the validator of your choice, click on “manage” on the right (see image below).
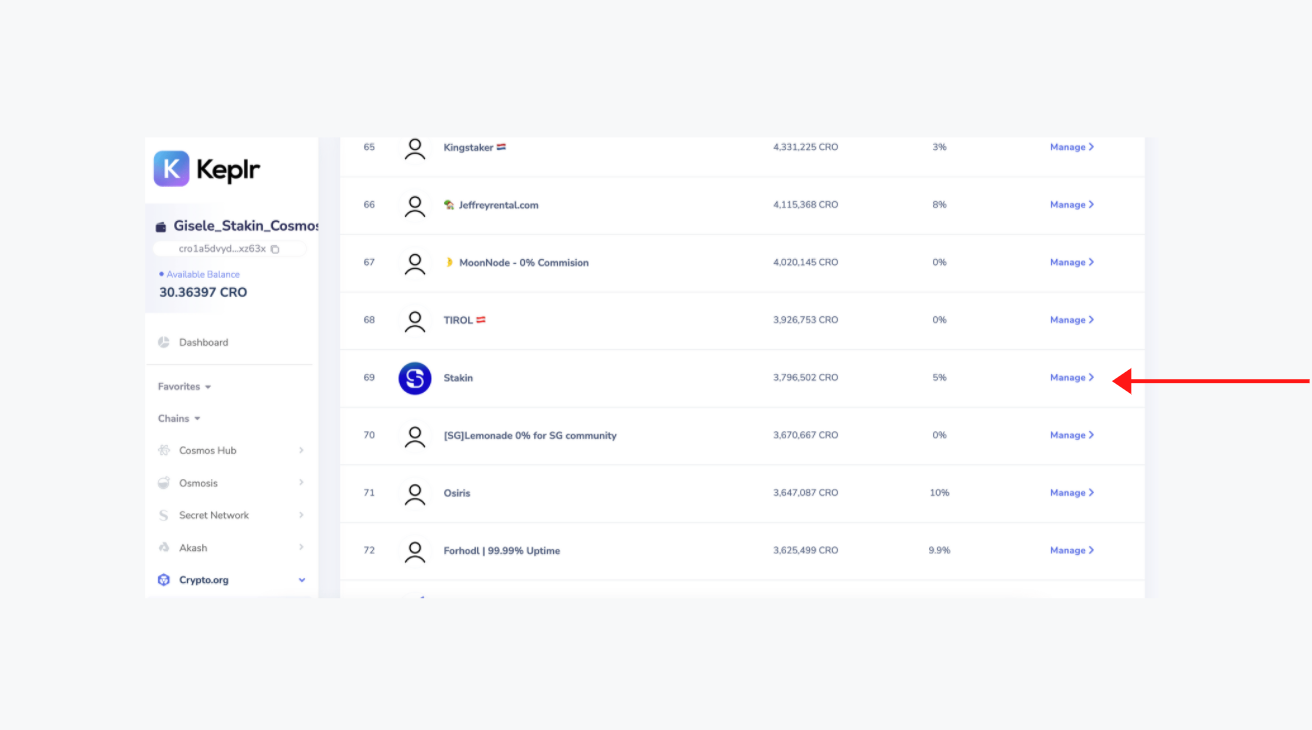
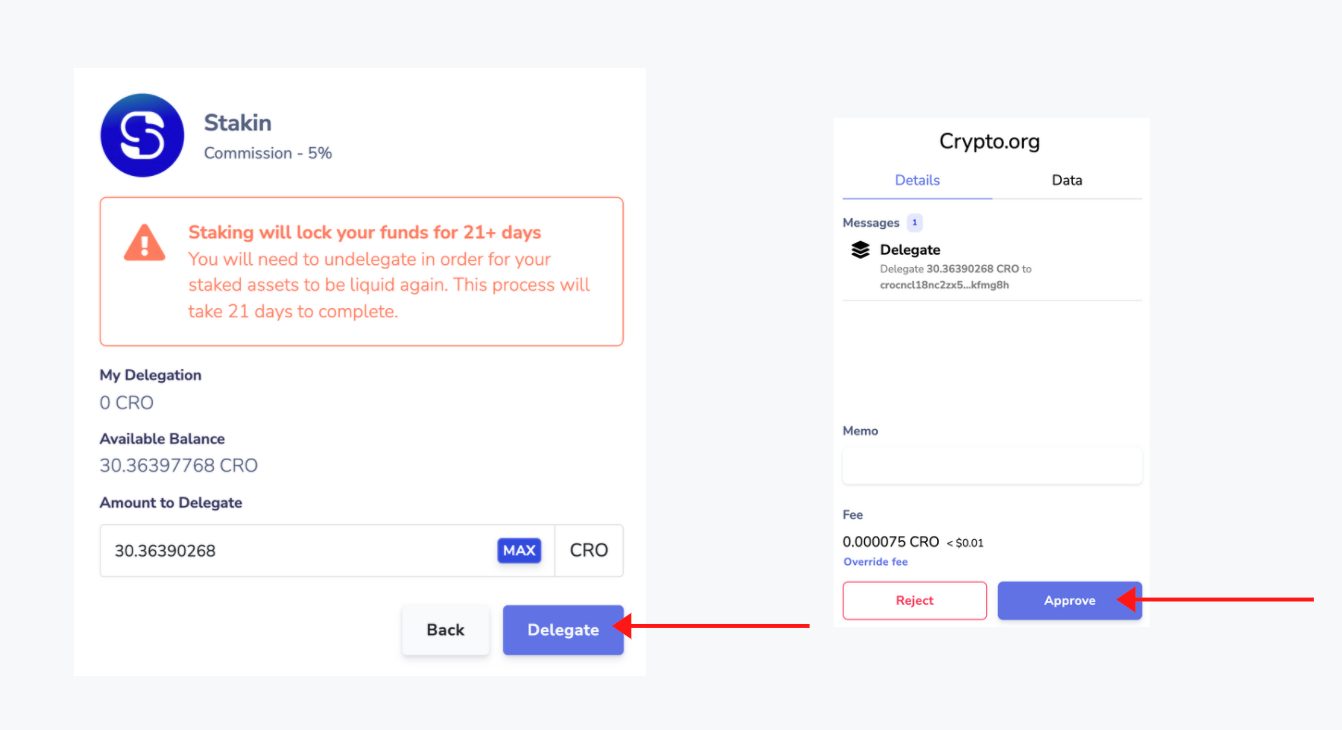
When you press “manage,” a pop-up will appear on which you can delegate to the selected validator. Please note: when staking, your funds will be locked for 21+ days. Additionally, ensure that before continuing, you have your Ledger device connected and the Cosmos app is “ready”.

Select “Delegate”, then fill out the amount of $CRO that you’d like to delegate (keep in mind that you’ll have to pay some fees, so leave some $CRO in your account for that). Select “Delegate” once again to continue.
The Keplr extension will open itself up, and on it, you can decide to pay a low, average, or high fee. It’s also possible to add a memo. Once selected, click on “set fee”. Next, double-check all the transaction details and choose “Approve” when ready. Your Ledger Device will now request you to confirm the transaction. Read through the details, and then select “approve” when everything is in order.
Congratulations!! You’ve now staked your $CRO!!
If you’d like to see how your assets are doing, how much you staked etc., select “Dashboard” in the left drop-down menu on the web browser. When you’re eligible to claim rewards, you can do so on right after your staked amount.
- You can use the crypto.org chain explorer if you’d like to see your transaction
 Crypto.org Chain
DISCLAIMER: This is not financial advice. Staking, delegation, and cryptocurrencies involve a high degree of risk, and there is always the possibility of loss, including the failure of all staked digital assets. Additionally, delegators are at risk of slashing in case of security or liveness faults on some protocols. We advise you to do your due diligence before choosing a validator.
Join the conversation