

The ultimate guide to staking and delegating your $KSM assets.
Hey Readers👩💻,
In today’s article, we’re discussing how you can stake and delegate your Kusama assets. If you own any DOTs (Polkadot’s native asset), remember that you can claim your KSM assets. For those of you unfamiliar with Polkadot, click here to read our full article.
🐤 Kusama A Quick Recap
Kusama is a nominated proof-of-stake network and an unrefined, experimental version of the more well-known Polkadot Network. Kusama was created as a testing ground for teams and developers to try out building and deploying, as well as experiment with governance, staking, nomination, and validation functionalities in a real environment. So, it’s almost like a permanent Testnet for Polkadot.
The developers of Kusama, refer to the network as a canary network; meant to look-out for the Polkadot network. It warns about issues to keep everything safe for the developers on the chain. It is important to note that the Kusama network isn’t economically centralized and, therefore, it doesn’t have a kill switch: it acts as a decentralized Mainnet network. The Kusama network is intended to exist as long as the community maintains it, allowing space for new high-risk functionalities and projects.
🚀 Let’s Get Staking!
Step 1 — Create Your Wallet
There are three ways to create a wallet for staking $KSM; you can use the Polkadot UI, the Polka Wallet, or the Polkadot JS staking app. If you’d like to use the Polkadot UI or Polka Wallet, an informative guide is available on the Polkadot Wiki. In this article, we’re staking with the Polkadot JS app.
First, go to the Chrome, Brave, or Firefox Store and download the extension. If you just want to use the webpage, go to https://polkadot.js.org/apps/#/accounts and select “accounts” and then “add new account”. Something you have to keep in mind every time you visit the Polkadot JS is to make sure you are on the right network.
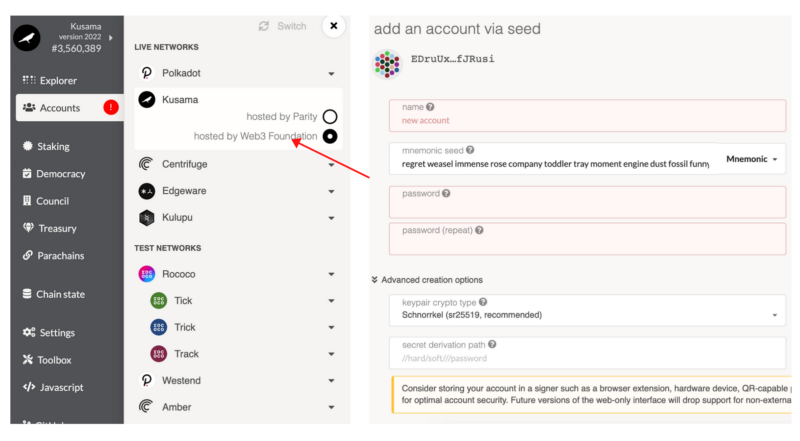
Fill out all the details and make sure you store your mnemonic seed phrase safely, such as offline or on a ledger. It is possible to copy the address of the account by clicking on it once created.
Step 2 — Bonding $KSM
Once your account is set-up, it’s time to start staking! First, go to the settings page and check if everything is set to the Kusama network. Second, select “staking” on the left menu.
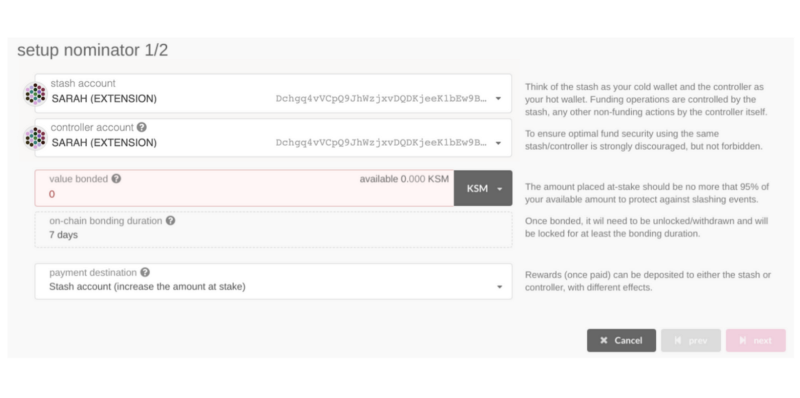
The “staking overview” will show you all the validators on the Kusama network. Select “account actions”. It is possible to have two separate accounts on Kusama, one for storing your funds called a stash and another account to control your staking. Do keep in mind that it will require transaction fees to manage assets between your two accounts.
Before you can stake, you have to bond your assets. To do so, select “+Nominator”. A pop-up will show up, looking like the one below. Put an amount at “value bonded”, remember not to put all your KSM as you still need some for the transaction fees and the reaping threshold. Both are currently 0.01 KSM. However, transaction fees are dynamic.
Once you select “next,” you’ll be asked to confirm your transaction. The unbonding period in Kusama is currently seven days, so keep that in mind.
Step 3 — Select a Validator
Now that you’ve bonded your assets, they are locked and could be slashed if the selected validator you nominate misbehaves. You can now select up to 16 different validators to send your assets too. Select “nominate” in the “account actions” tab. A pop-up will ask you which validators you’d like to select. You’ll be asked to confirm by entering your password.
🎉 ✅ And that’s it! You’ve now staked your assets.
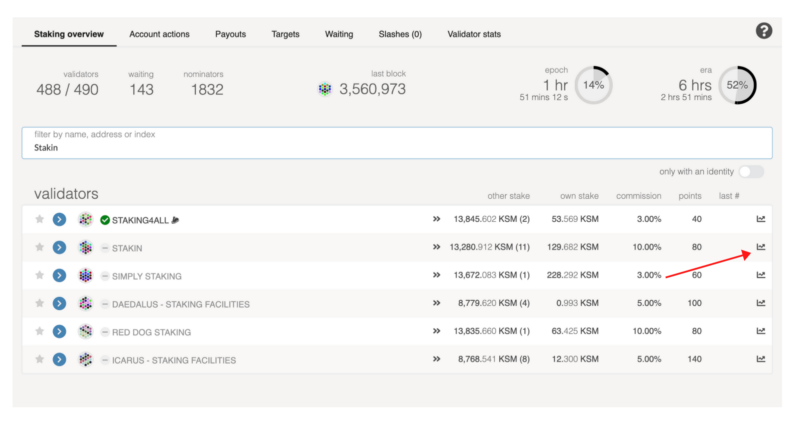
Suppose you want to know more about the validators you’re sending assets to. Select the little graph on the right side of their name (see image below). It will bring you to the validator stats, where you can see their performance.
If you like to select Stakin as your validator, you can do so by sending your $KSM to this address:
D8rBgbN7NWa4k9Wa5aeupP2rjo6iYoHPTxxJU5ef35PUQJN
Join the conversation