

A step-by-step guide on staking your Sentinel assets
Sentinel is a blockchain framework for building decentralized VPN Applications. The Sentinel ecosystem aims to empower universal access to the internet in a trusted and provable manner.
Sentinel's goals will be achieved by allowing organizations and individuals worldwide to construct cost-effective, scalable, distributed, and decentralized networking solutions on Sentinel’s Cosmos-based blockchain by utilizing: 1. decentralized consensus, 2. open-source networking integrations, and 3. a distributed community-based network.
After the release of the Cosmos IBC, which happened on the 18th of February 2021, Sentinel will now perform the role of providing a private network or dVPN layer within the Web 3.0 Infrastructure.
However, the first and primary focus of the Sentinel ecosystem is to provide a framework for Decentralized Virtual Private Networks or dVPNs. All over the world, VPN applications are used by individuals to access otherwise geo-restricted content. For example, Netflix shows specific movies and series in Europe but not in South America; a VPN can then access the streaming platform’s entire database. Furthermore, VPNs make sure that your privacy is kept through the establishment of an encrypted connection.
Sentinel dVPNs
Sentinel aims to challenge the current status quo and prove that decentralized networks can provide utility and monetization for the mainstream user. To build dVPNs on Sentinel’s framework and make a real impact on the way people secure their communications, these dVPNs need to be interesting for a broader audience beyond general crypto-native users. There are already over 200.000 Android devices on which Sentinel-based dVPNs are being used every day. Sentinel dVPNs are among the first DApps to use traditional payment channels to incentivize a distributed and decentralized network of service providers.
For example, Velocity dVPN (a third-party dVPN built on Sentinel) is an excellent illustration of Sentinel’s scalability vision. Velocity is an entirely free VPN that can be used without ads, etc. Sentinel dreams that within the next few years, dozens of cross-platform dVPNs applications are created by 3rd parties who assume the responsibilities of the brand while monetizing through traditional fiat channels and paying service providers in exchange for probably encrypted and secure bandwidth.
Sentinel Network
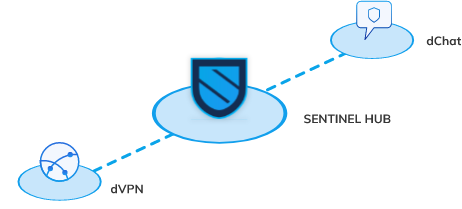
The Sentinel Network Mainnet is built on the Cosmos SDK and leverages Tendermint. Security and governance are assured through the validator network. So, how does it work? The Sentinel Hub is responsible for activity on the Sentinel Network (see image below). Each zone within the network runs various decentralized or centralized apps. It is up to the network’s validators to secure the independent Zones, or a Zone can have its validators specific to the Zone. Multiple apps such as dVPN, dChat, and other Private Nets can also run as a Zone on the Sentinel Network.
The Sentinel Validator Network powers Sentinel’s governance. Validators within the network will validate transactions based on the tokens they stake and are delegated to them. Additionally, validators are specific to the Sentinel Hub and enable the governance of the entire network. Zones’ Validators secure the chain dedicated to the Zone’s functioning, and communication between chains happens through Cosmos Network’s IBC.
Sentinel Token Economics
The Sentinel Network has a decreasing inflation reward schedule and a fixed maximum token supply. The network is DPOS, which means it is only as resilient as the strength of its holders and stakers. The lower the overall number of network assets staked, the higher the surface for an attack like double spends and parallel forks will happen.
To make Sentinel Network as robust as possible in the early years of rapid growth, Sentinel has employed a halving-like model during the first period to incentivize staking while also rewarding early adopters and community members with greater rewards. In the first period, the Sentinel asset’s inflation ($DVPN) will be divided into epochs of 6 months. After each epoch, the inflation rate decreased by 6%. The initial inflation rate will be 49% on Genesis. The model will be adapted until the blockchain validation rewards reach a 13% annualized inflation. After that, inflation will proceed in a constant decay model (per block) approaching zero until the Sentinel chain maximum hard cap of 48 billion digital assets.
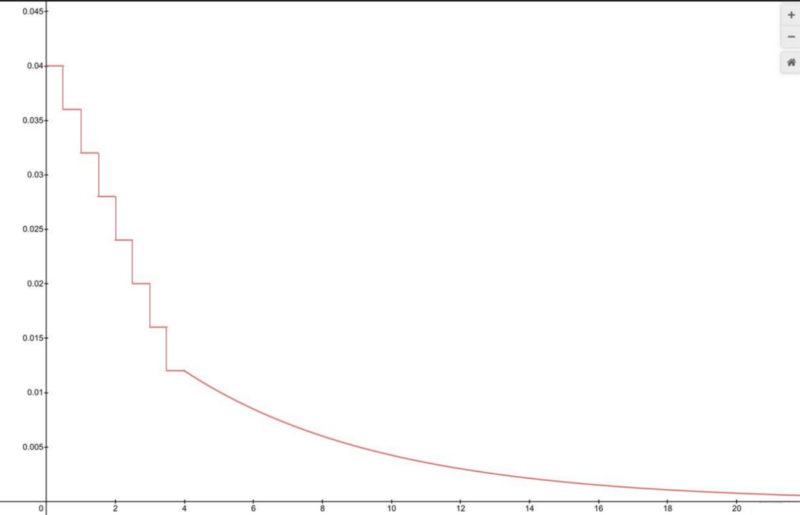
Monthly Inflation Rate Visualized, First Published by Sentinel.
The second period will utilize an exponentially decaying emission curve. The hope is that Sentinel Network will have grown bigger by Period 2, where the network’s asset value can accrue value by increased scarcity and demand sharing from node hosts.
Below is a shortlist of the additional factors that influence the $DVPN token economics:
- Minimum delegator fee: 0.25% validator fee.
- Unbonding time: 28 days.
- Maximum validators: 50 at Genesis, to be increased through governance.
- Circulating Supply: 1.999.969.999 DVPN, according to CoinMarketCap.
Staking Your $DVPN
Now, let’s get to staking $DVPN. In case you don’t own any $DVPN yet, you can buy or exchange them on the MXC Exchange and some other major exchanges.
Before being able to stake your $DVPN assets, you must set up your Sentinel Wallet. If you already have a mnemonic, you can use it to access your wallet. So, let’s have a look.
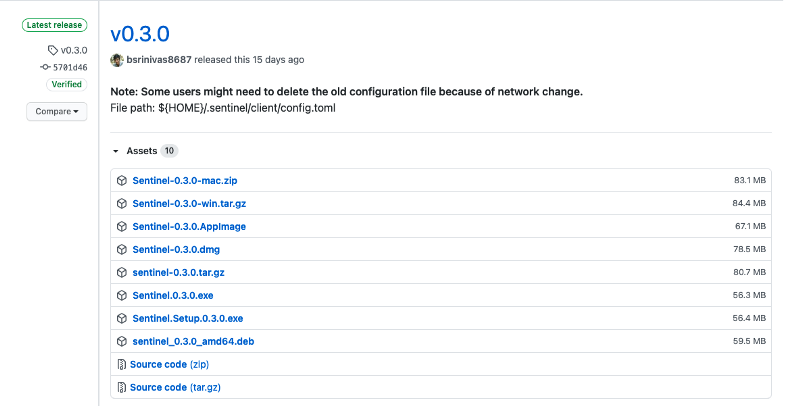
To download Sentinel wallet, head to the Official Sentinel Hub Github repo: https://github.com/sentinel-official/desktop-client/releases/. There, you will find different wallet versions for operating systems, including Mac, Linux, Android, Windows, etc.
For the v0.3.0 of the Sentinel wallet, check out these links:
- Release: https://github.com/sentinel-official/desktop-client/releases/tag/v0.3.0
- Mac: https://github.com/sentinel-official/desktop-client/releases/download/v0.3.0/Sentinel-0.3.0.dmg
- Windows: https://github.com/sentinel-official/desktop-client/releases/download/v0.3.0/Sentinel.0.3.0.exe
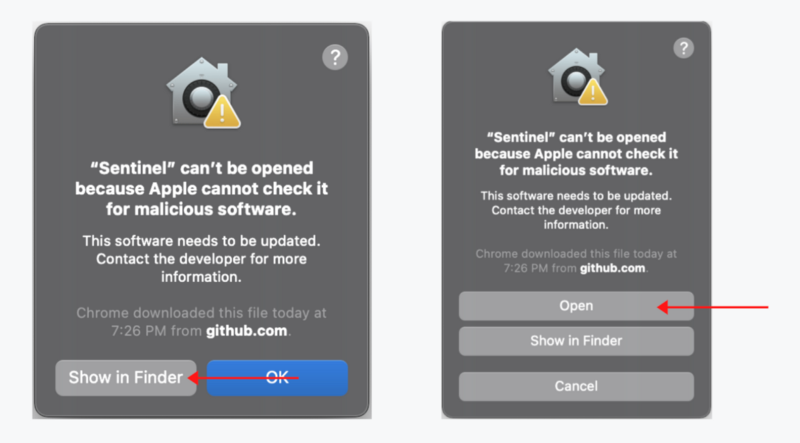
After the download, your computer might give you an error message when you try to open the wallet. If your Mac or Windows PC informs you that this application is unsafe to run, don’t worry. It is! You just need to do some minor troubleshooting.
On Mac, if you see the left popup (see image below), please select ‘Show in Finder’. Your Finder will open with the Sentinel application selected. Right-click on ‘Open’, and it should show you a popup similar to the below right one. Select the ‘Open’ button again to start the application.
In Windows, select ‘More info’ and then click the button ‘Run anyway’. Once you’ve opened the application, Sentinel Client Manager will run in the background.
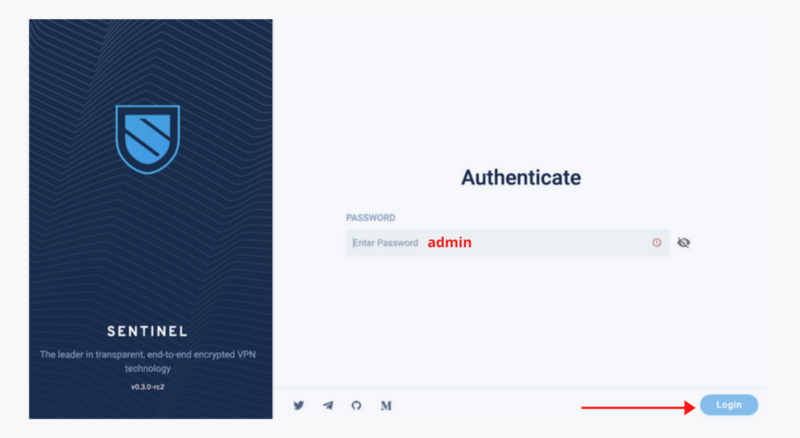
You will now need to authenticate. The application will ask you for a password; fill in: admin. Please keep in mind that you will have to enter this password every time you open the wallet. Next, select the ‘Login’ button.
A configuration screen will appear. You do not need to adjust any of the settings. Select ‘Save’ to continue.
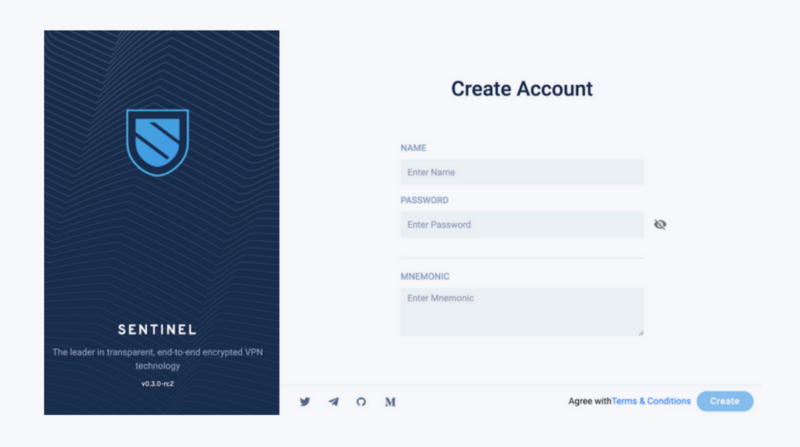
Now it’s time to create your account. Fill out your username and password; make sure to write both down in a secure (preferably offline) location. You will also be asked for a mnemonic phrase. Ignore this section for now, and select ‘Create.’
Next, copy the account address, and the public key and download the mnemonic phrase or write it down. Be sure to save your phrase securely, as this is the only way to recover your account if you lose your password. Scroll down and select ‘Continue’.
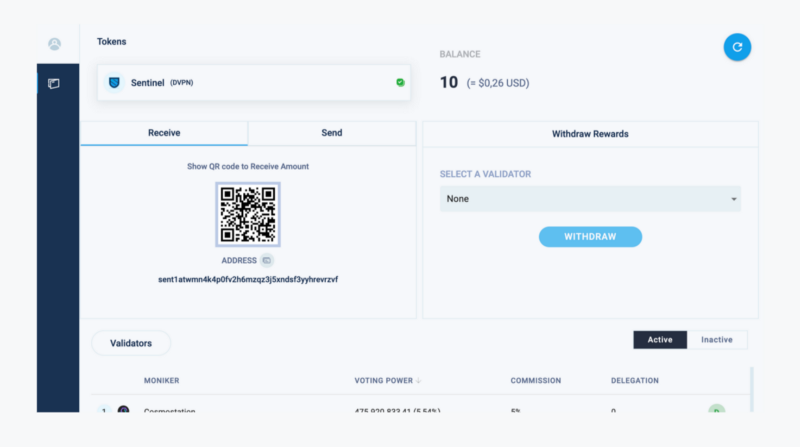
You will now be shown the Sentinel Wallet dashboard, which should look similar to the one below. Use your public address to transfer $DVPN assets to your wallet.
It’s now time to choose a validator. If you are unfamiliar with the Sentinel Network’s validators or are not sure how you should be selecting yours, please look at the Sentinel Choosing A Validator Guide.
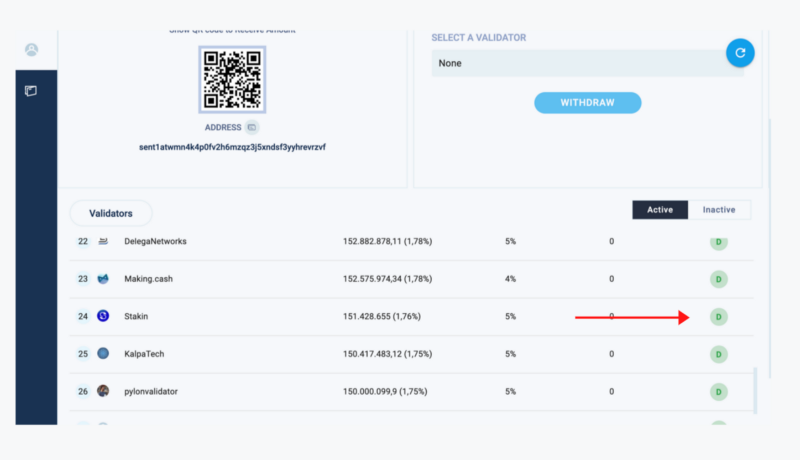
On your wallet dashboard, scroll down to the list of validators. When you’ve found the validator to whom you’d like to delegate your assets, select the small ‘D’ on the right side of their name.
A popup such as the one below should appear. Before continuing, please make sure to double-check the validator address. In case you’d like to delegate your assets to Stakin, this is the address: sentvaloper13gmgxsxdvmytnr75uscuw350n6f0qfrvgdacw4
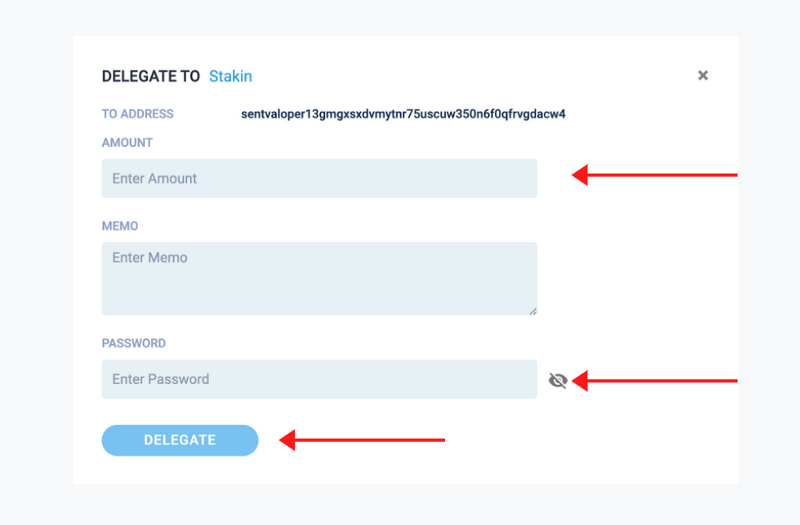
After that, fill out the amount of $DVPN that you’d like to stake. If you want, you can also add a memo. Next, fill out your password and select ‘Delegate’.
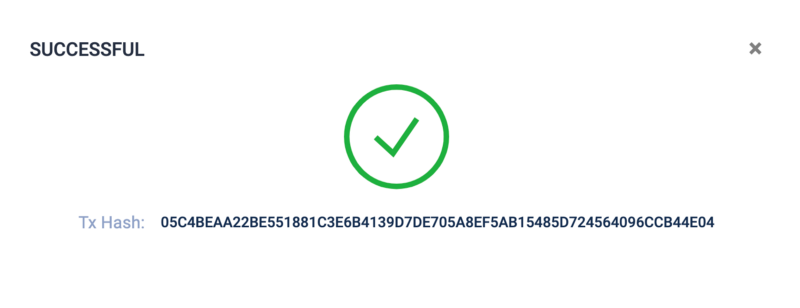
If your transfer is successful, a message similar to the one above should be displayed. And that’s it! You’ve now staked your assets.
Side note: Make sure you leave some $DVPN tokens available to claim rewards!
DISCLAIMER: This is not financial advice. Staking, delegation, and cryptocurrencies involve a high degree of risk, and there is always the possibility of loss, including the failure of all staked digital assets. Additionally, delegators are at risk of slashing in case of security or liveness faults on some protocols. We advise you to do your due diligence before choosing a validator.
Join the conversation