

Staking for Solana $SOL on Trust Wallet is finally here!! Have a look at the step-by-step guide to make it even easier.
The day has finally come that we can tell you that $SOL is now available in the Trust Wallet! Solana is one of the most well-known blockchain ecosystems and aims to be the fastest blockchain in the world and the fastest-growing ecosystem in crypto, with thousands of projects spanning DeFi, NFTs, Web3, and more. In this article, we’ll run through the staking process step-by-step in this guide, so let’s get started.
Setting Up Your Trust Wallet
First, for those who are unfamiliar with Trust Wallet, you can obtain the app via their website, Apple Store, or the Android Play store. Please keep in mind that all interfaces work the same, whether you’re using Android or iOS. If you want to get started, download the app.
Once downloaded, open up and select “Create a new wallet”, if you had a wallet previously, and you’d like to import it, select: “I already have a wallet” and use your private seed phrase to install your wallet on the new device. If this is your first time, the app will after selecting to create a new wallet remind you that the private key should be kept private and offline at all times. In addition, please note that, if you lose your private key, your funds will be lost.
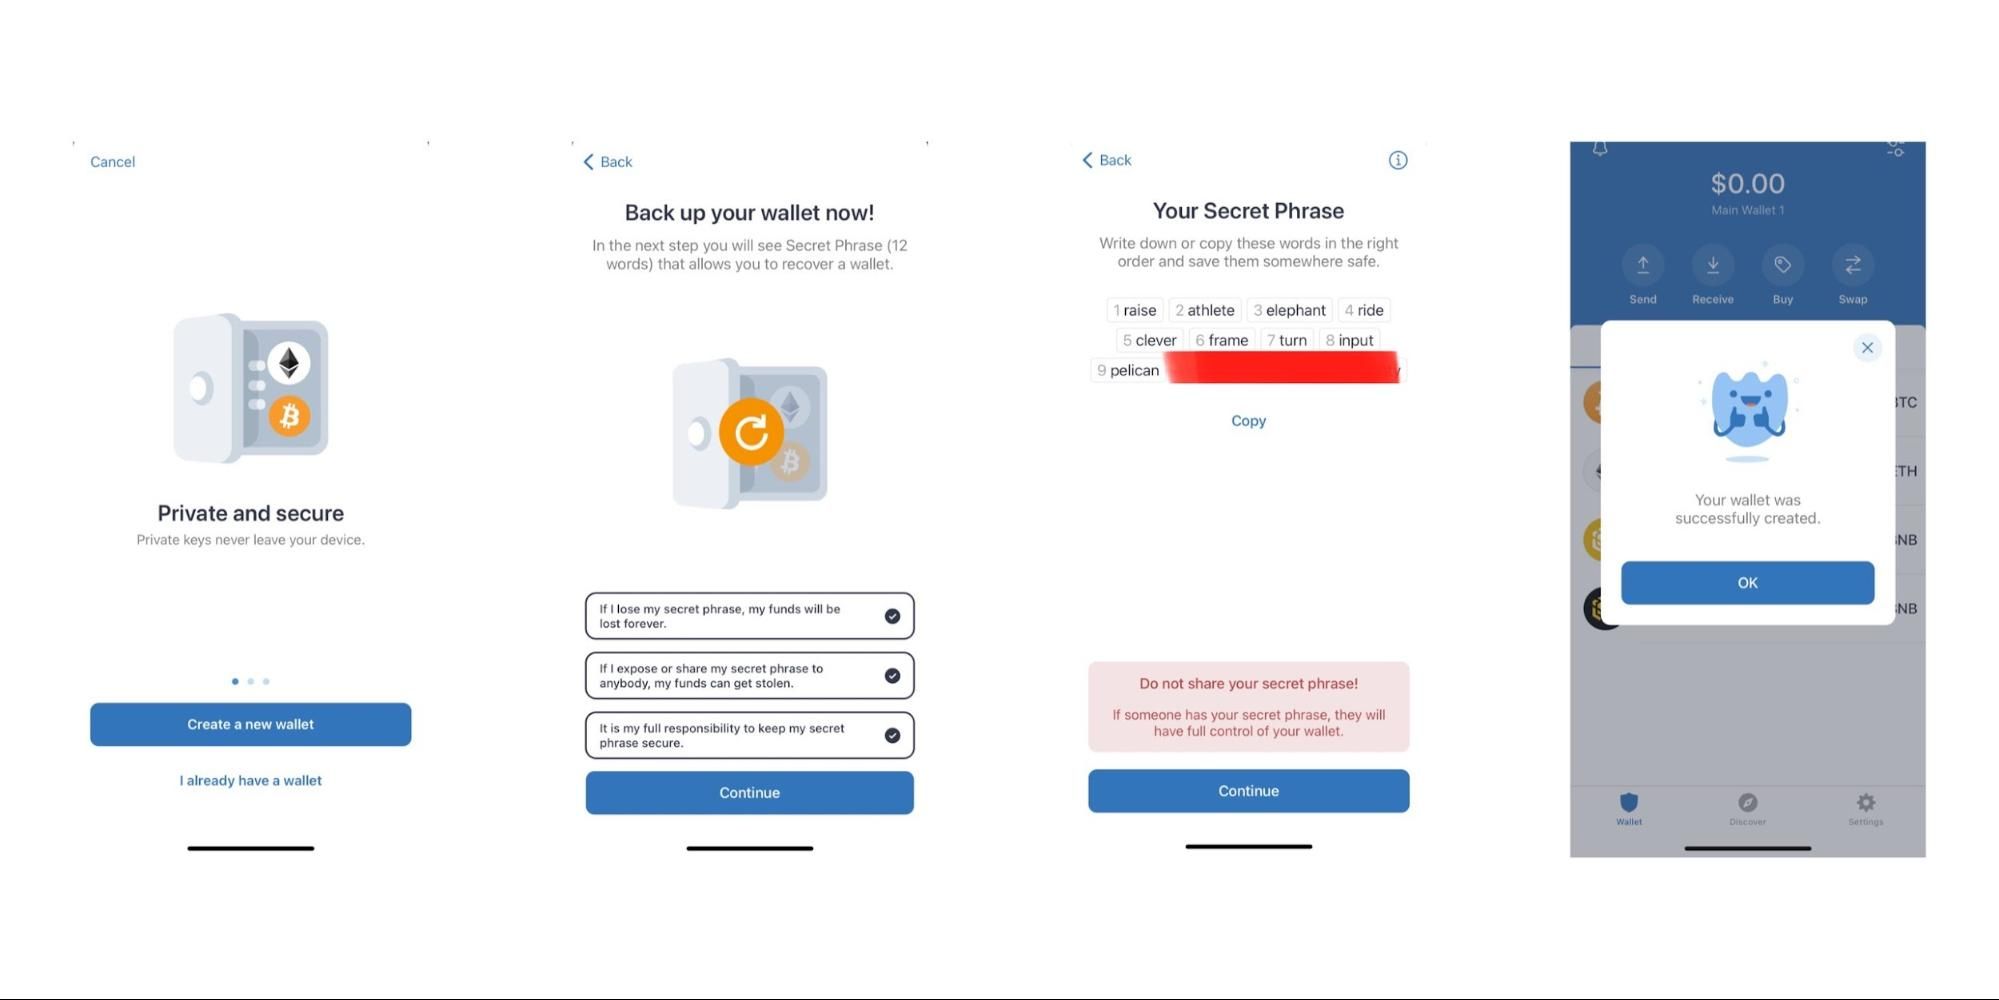
Copy the given private key to a secure location (preferably offline) and select “Continue”. When successful, a pop-up should appear telling you that you’ve now successfully created your wallet.
This means it’s time to get to delegating your Solana assets!
Delegating or Staking Your Solana Assets
To get started, on the top right of the “wallet” section, select the “sliders icon” (see image below). Next, type ‘Solana” into the search area to find the asset and slide to green – to turn on the Solana wallet function. You’re now ready to receive your $SOL from any exchange or other wallet in which you’re currently holding the assets.
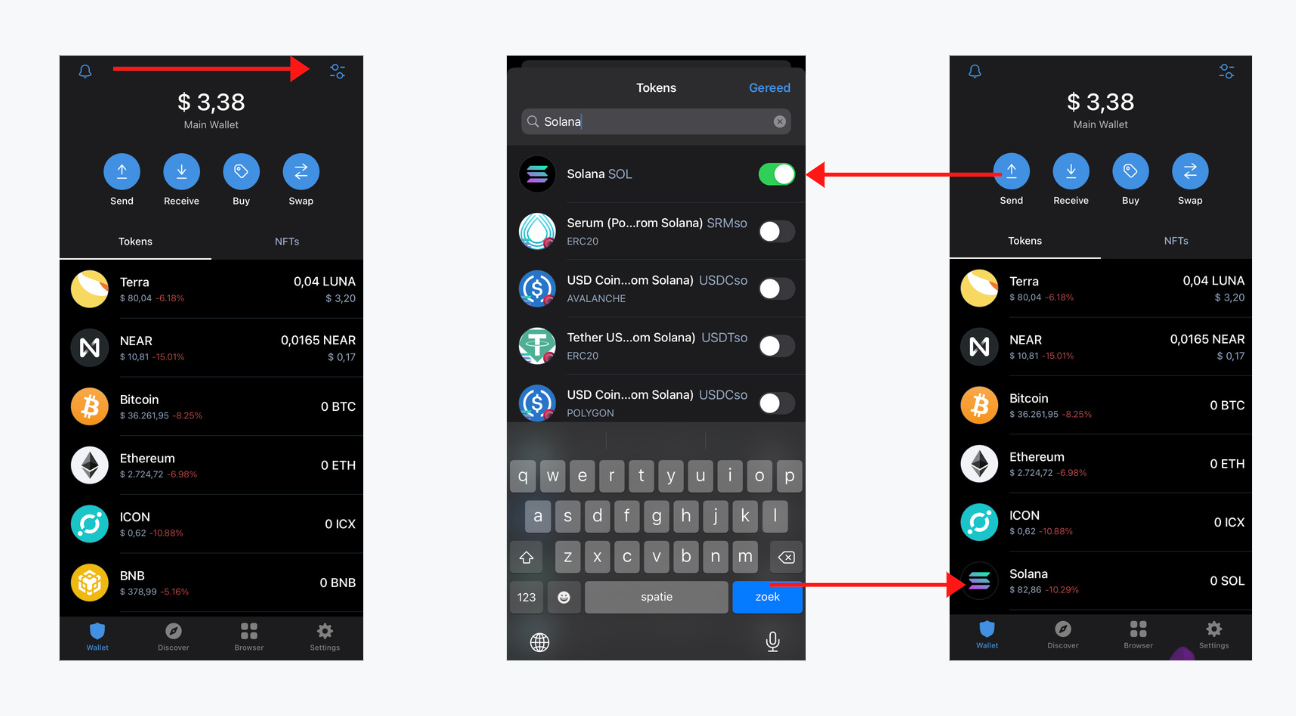
Select “Solana” and then select “Receive”, copy the address and make your transaction from the exchange or wallet. Thereafter, select “Solana” once again to get started with staking.
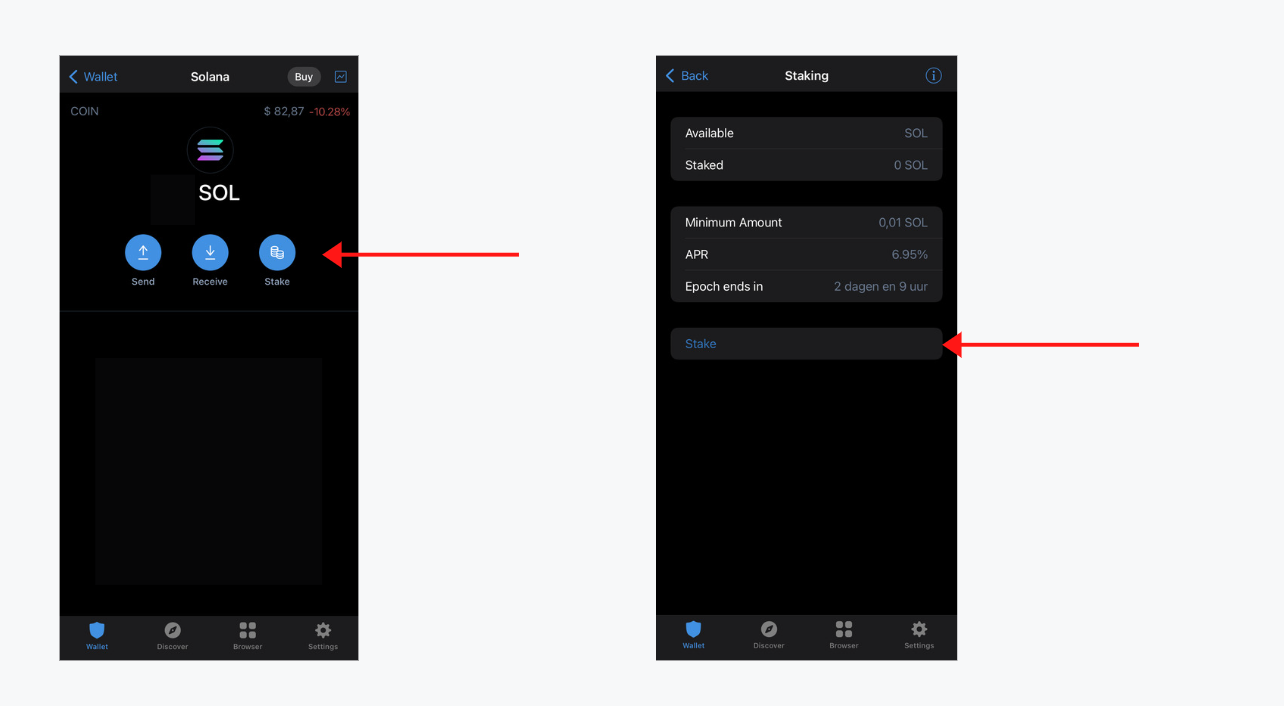
On the Solana wallet dashboard (see image on the left, above) you will see the button “Stake”. Select “Stake” to continue. Next, the staking dashboard will appear. In the dashboard, you’ll find the currently available amount of $SOL, the current staked amount of $SOL, the duration of the Epoch, the expected APR, and the minimum amount of $SOL that you’re able to stake. It is worth mentioning that you’ll need to keep a small amount of $SOL in your wallet for any transactions such as staking and in the future even undelegating. Finally, at the bottom of the list, you’ll find “Stake” once again, select this button to find the list of available validators.
Please keep in mind that the Solana ecosystem has more validators than the ones currently listed on Trust Wallet, you can find a guide on staking $SOL with Solflare or Phantom wallet below.
 Gisele Schout
 Gisele Schout

Select the validator of your choice and next, select the amount that you’d like to stake. Now, select “Next” and read through all the details of your transaction. Select “Confirm” to continue and that’s it, you are now earning passive income on your $SOL, congrats!
DISCLAIMER: This is not financial advice. Staking, delegation, and cryptocurrencies involve a high degree of risk, and there is always the possibility of loss, including the failure of all staked digital assets. Additionally, delegators are at risk of slashing in case of security or liveness faults on some protocols. We advise you to do your due diligence before choosing a validator.
Join the conversation