

Here's everything you need to know about staking with the Keplr wallet.
If you're someone who loves cryptocurrencies and desires to actively participate in securing blockchain networks while earning rewards, then staking is the way to go. In this comprehensive guide, we will explore the ins and outs of staking with the Keplr Wallet, empowering you to embark on a seamless and rewarding staking journey.
Keplr is a non-custodial, multi-chain wallet that supports an extensive range of digital assets. It is compatible with prominent blockchain platforms in the Cosmos Hub, like Kava, Evmos, Juno, many others and of course ATOM itself, making it a versatile choice for those looking to stake across different networks.
Part 1 - Setting Up Your Keplr Wallet
- To get started, go to: https://wallet.keplr.app/ to download the Keplr extension.
Once downloaded, open the page. Select "Create a new wallet" to start setting up your account. If you already have a Keplr wallet, select "Import existing wallet."

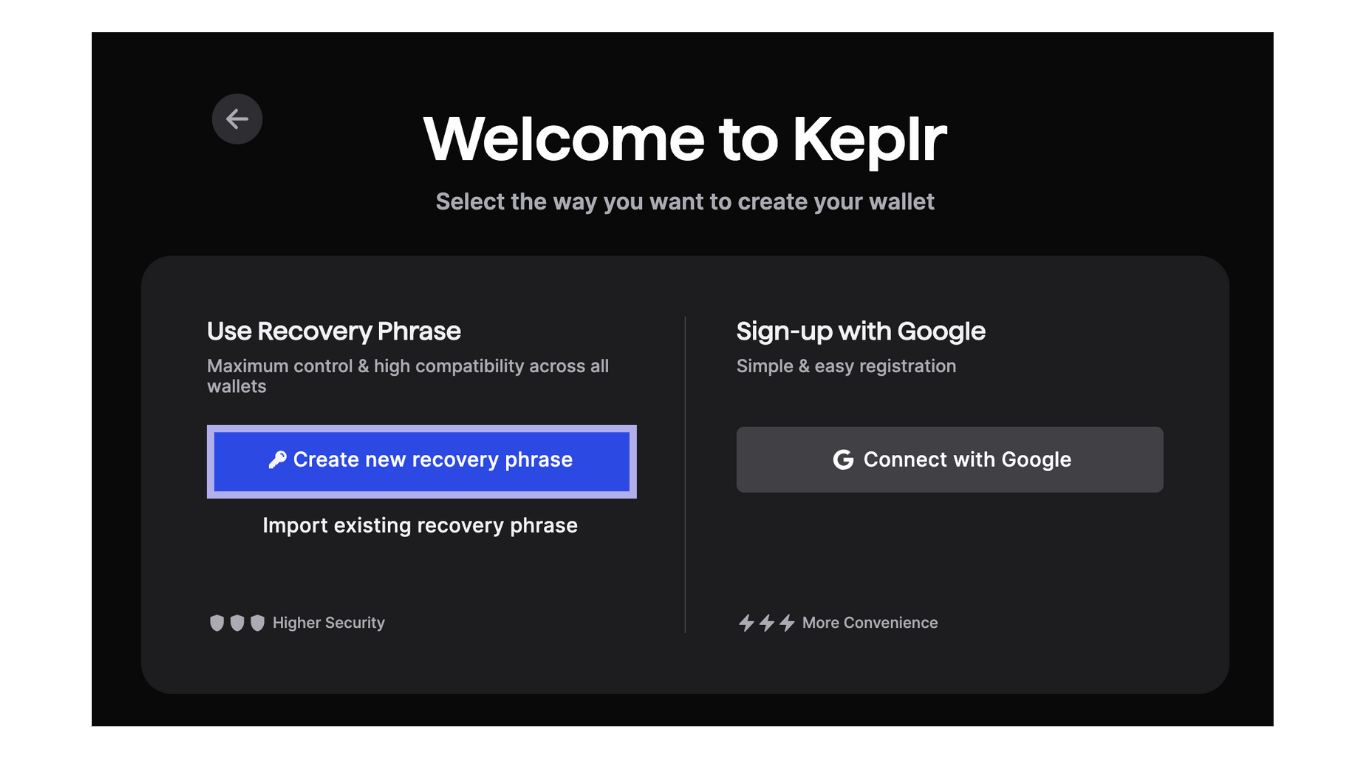
If you've selected "Create a new wallet", Keplr will ask you to select a new recovery phrase or to connect with Google. In this guide, we'll use the Recovery Phrase.
Remember to store your recovery phrase securely offline and never share it with anyone. If you lose your recovery phrase, you will lose the assets within the wallet.
Once you've copied your seed phrase, fill out your account name, desired password and confirm by selecting "Next".
Fill out your seed phrase in the correct order to register. Click on the words to create the sentence, then select "Register". That's it! You've now created your Keplr wallet. Select "Done" to close the registration webpage; your wallet should open in the web extension. Go to: https://wallet.keplr.app/ to continue.
Part 2 - Depositing assets
Once you're wallet is set-up its time to start staking. If you don't have any assets in your wallet, you can transfer them from any CEX, DEX or other wallet by selecting "deposit".
Either scan the QR-code or use the public wallet address to deposit your cryptoassets to your wallet.
Once you've sent your assets to your wallet, wait a couple of seconds, grab yourself a coffee, and return to get started with staking!
Step 3 - Staking your Cosmos Hub assets
To get started with staking, open the Keplr dashboard via the extension or go directly to https://wallet.keplr.app/.
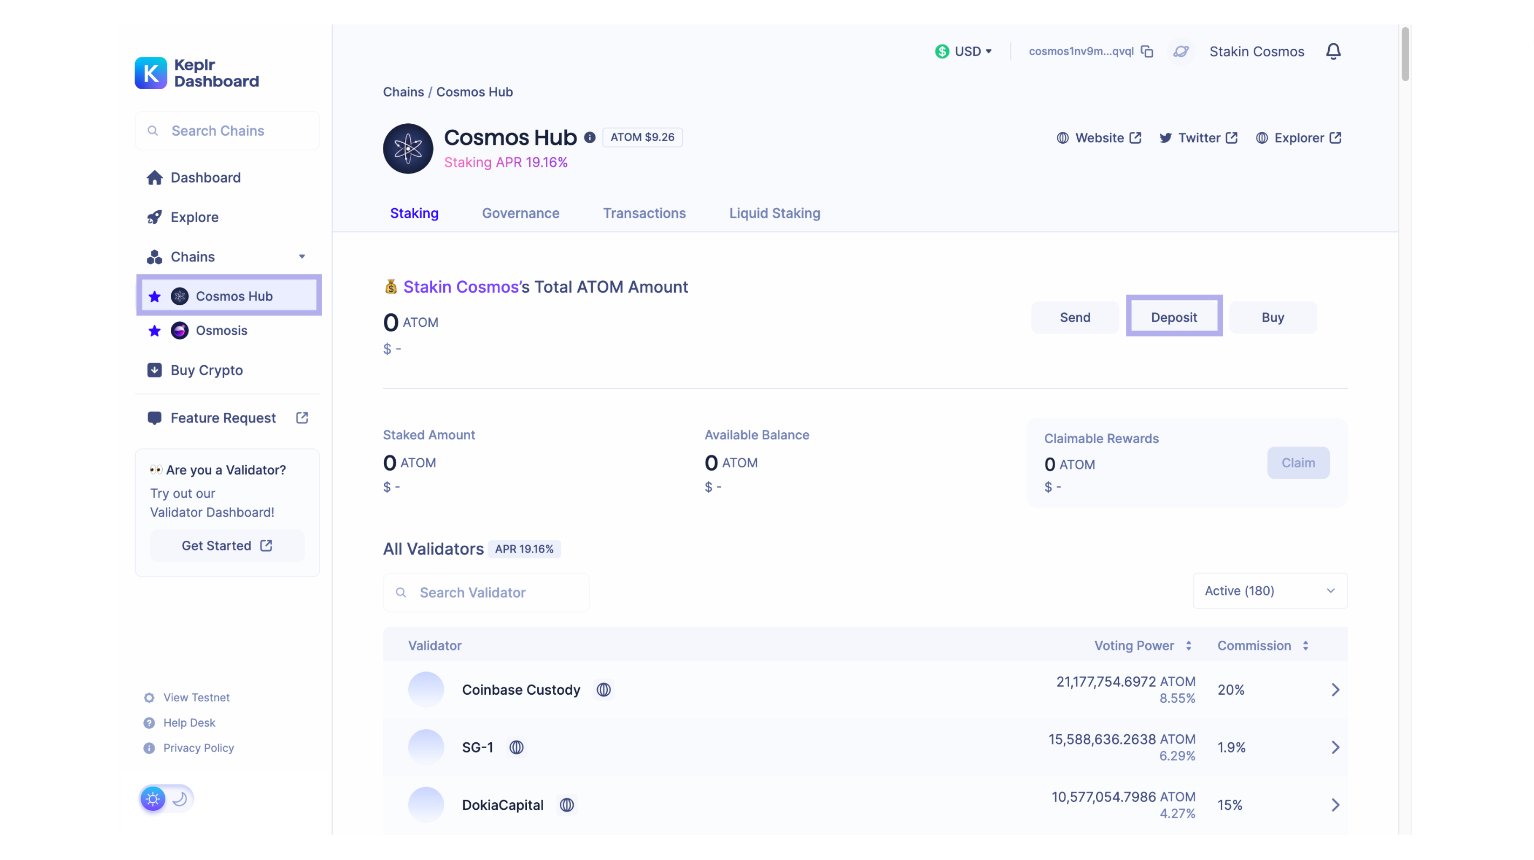
On the left side of the dashboard, select the asset you'd like to stake. In our case, we're using Cosmos as an example.
Once you've selected the asset of your choice, your screen should be similar to the one above.
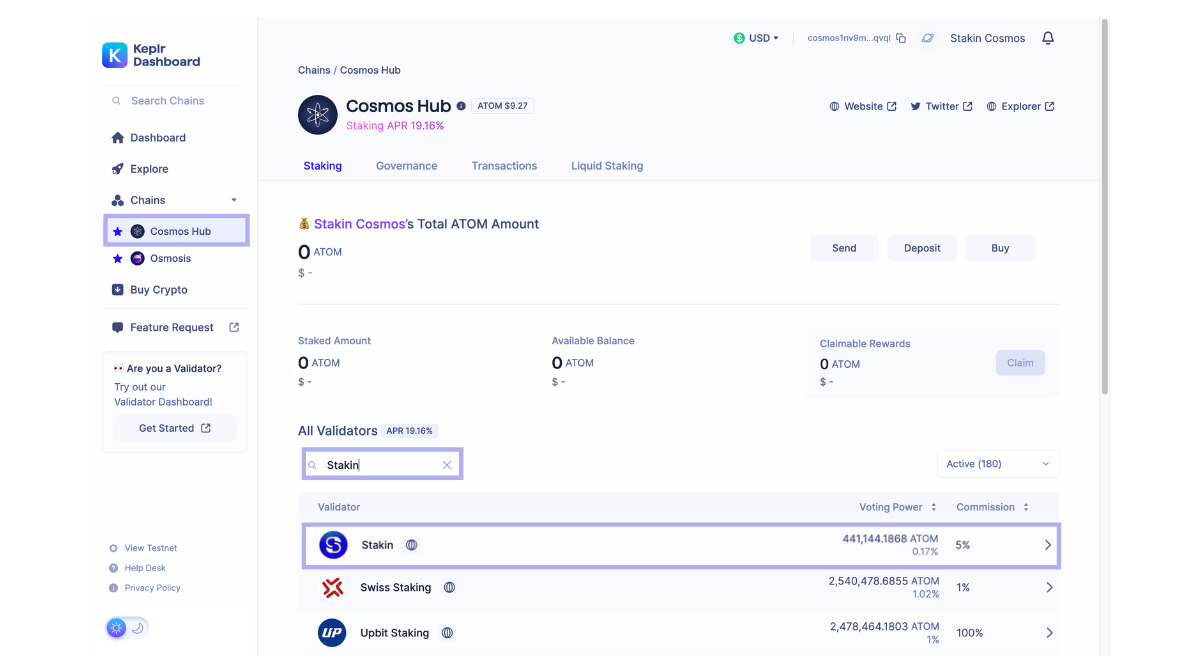
You can scroll through all the different validators available, or type the name of your favorite validator into the search bar to quickly find the validator of your choice.
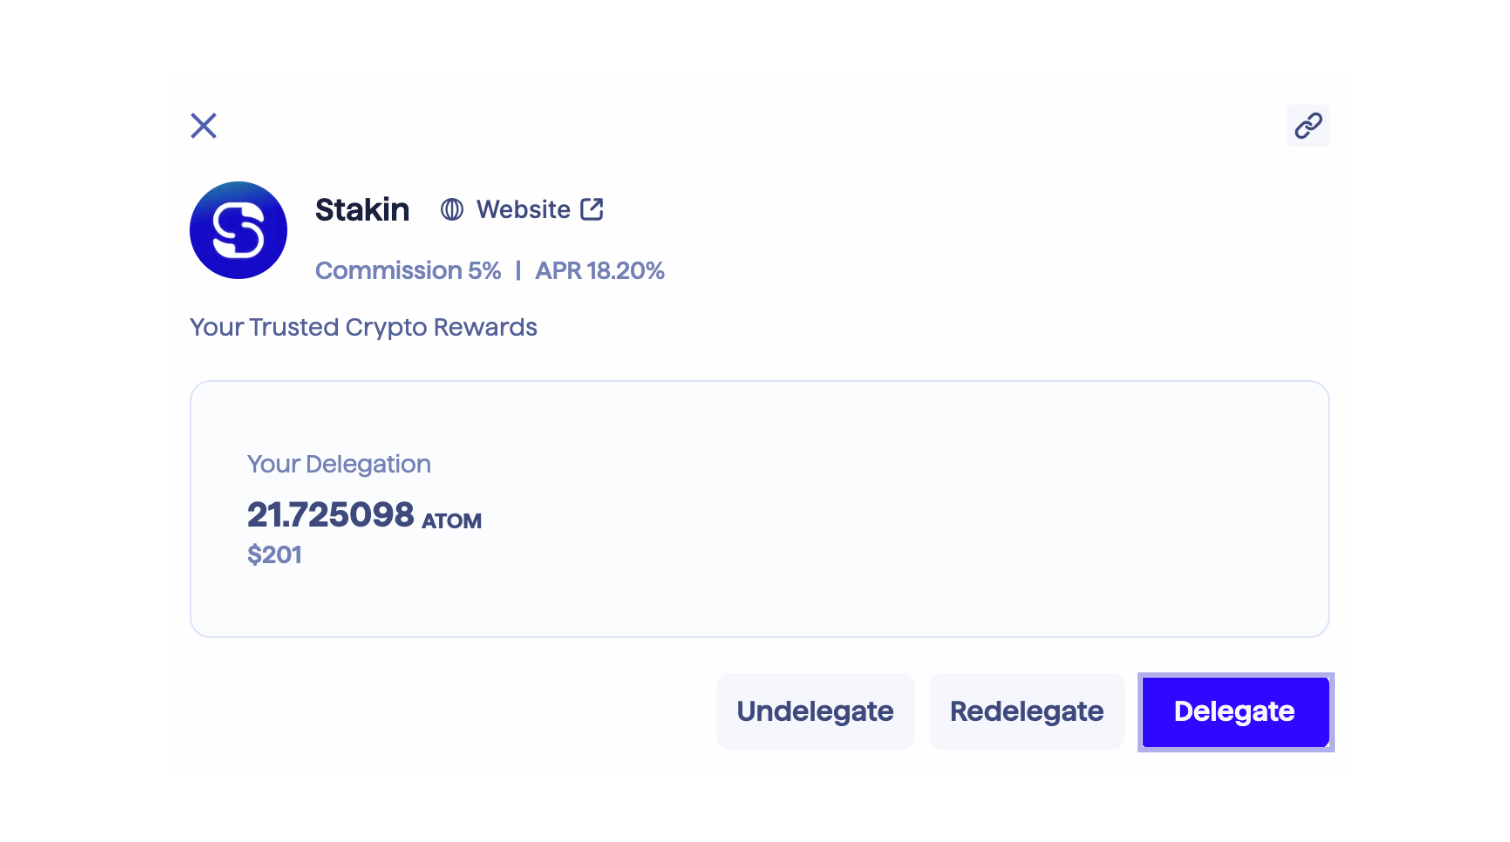
Click on the validator to continue. Select "Delegate" (see image below).
- Side note: it's also possible to stake $ATOM with Stakin on Keplr directly via here.
Note that staking will lock-up your assets for 21 days. You will need to undelegate in order for your staked assets to be liquid again. This process will take 21 days to complete.
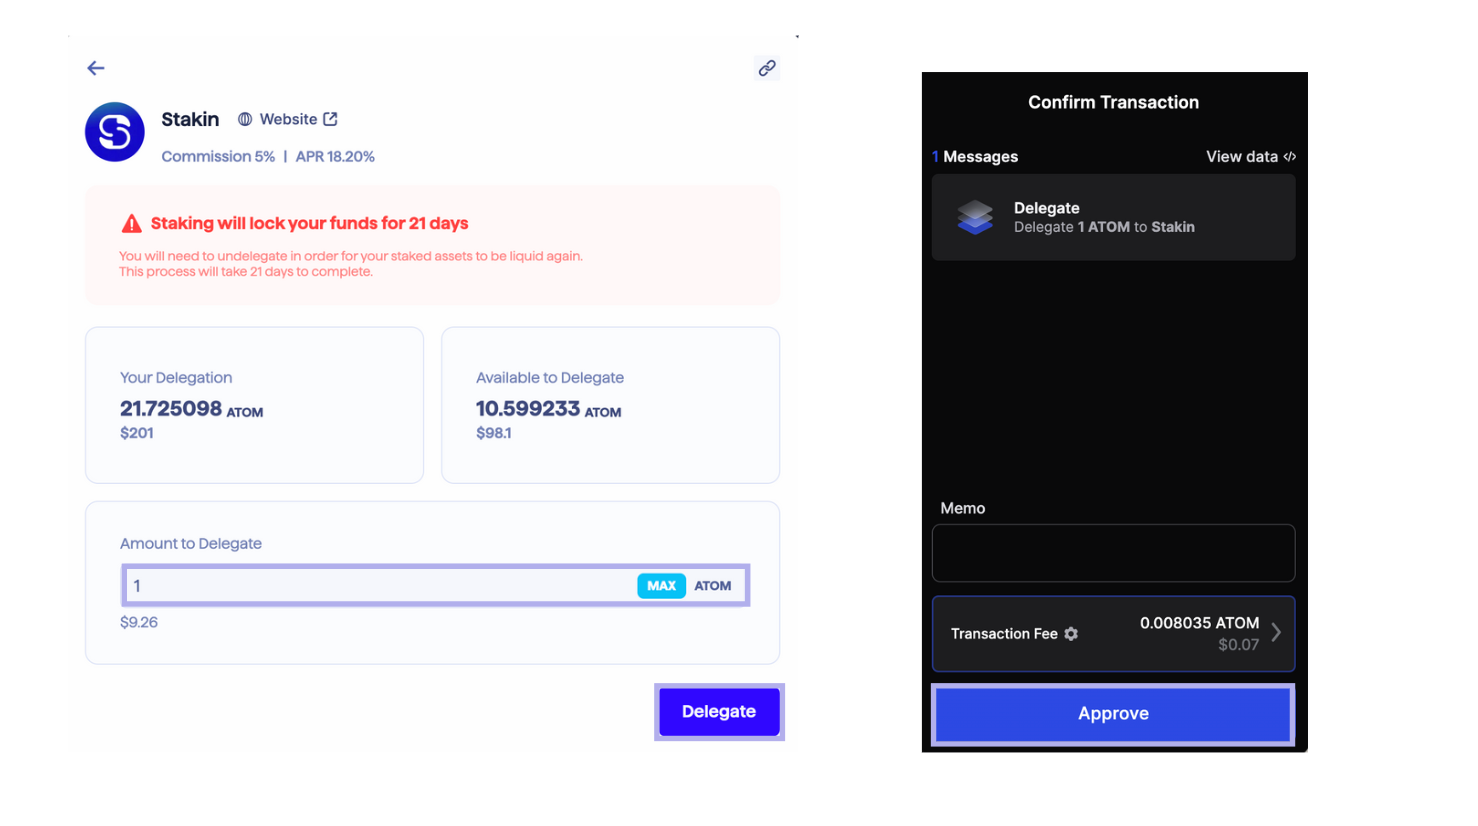
Fill out the amount you'd like to stake and select "Delegate" once again. Next, a pop-up will appear asking you to confirm the transaction. Read through the information, and add a memo if needed. Then select "Approve".
- Make sure to keep some assets in your wallet for transaction fees.
Congratulations! You've now successfully staked on Keplr Wallet!
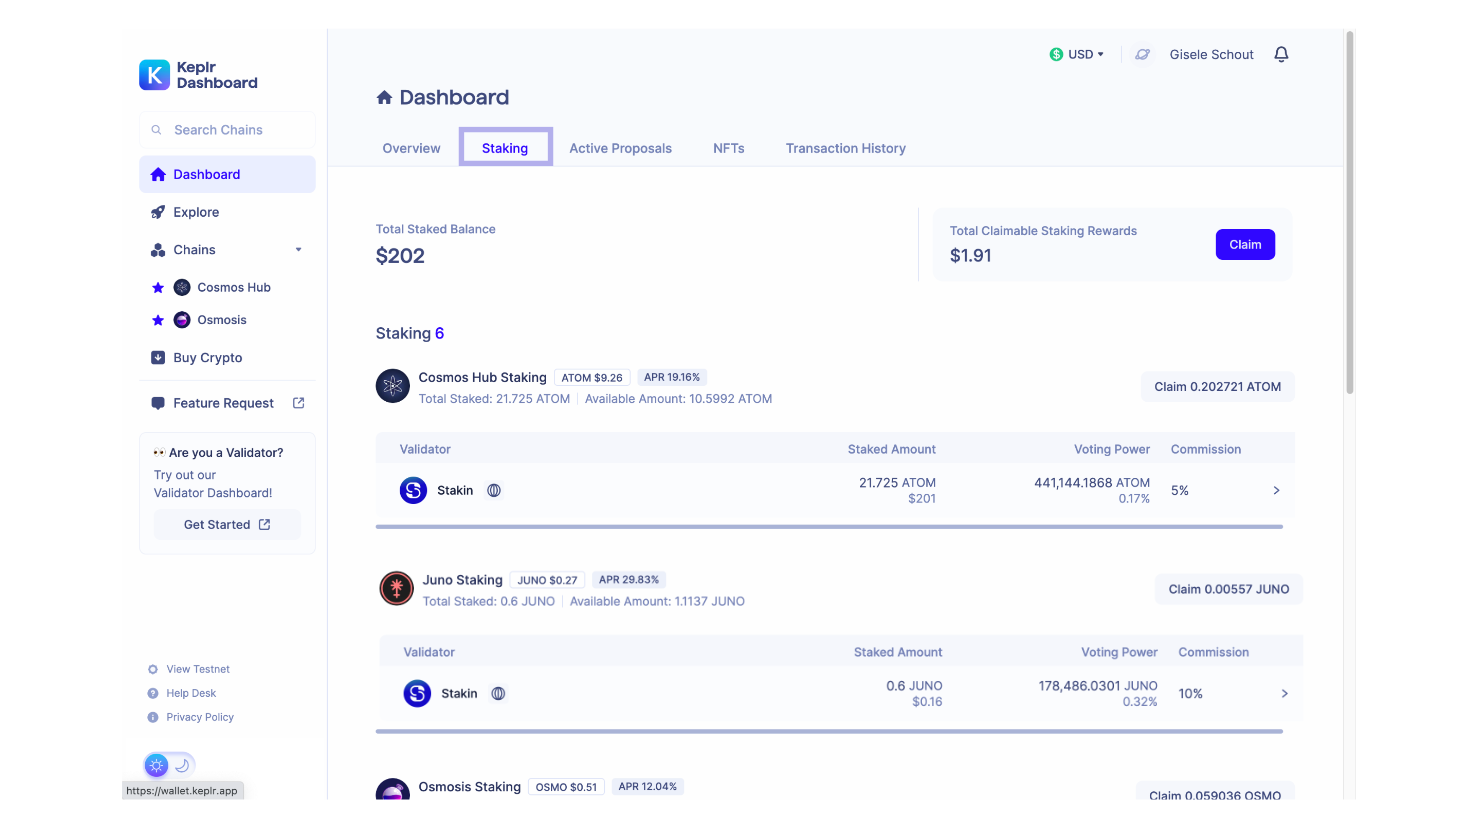
Under "My Validators" in the dashboard, you'll be able to see all the validators you staked with. If you're staking multiple assets, you can go to the "Staking" tab to get an overview of all your currently staked assets, their value and claiming options (see image below).

Part 4 - Claiming staked assets and re-staking
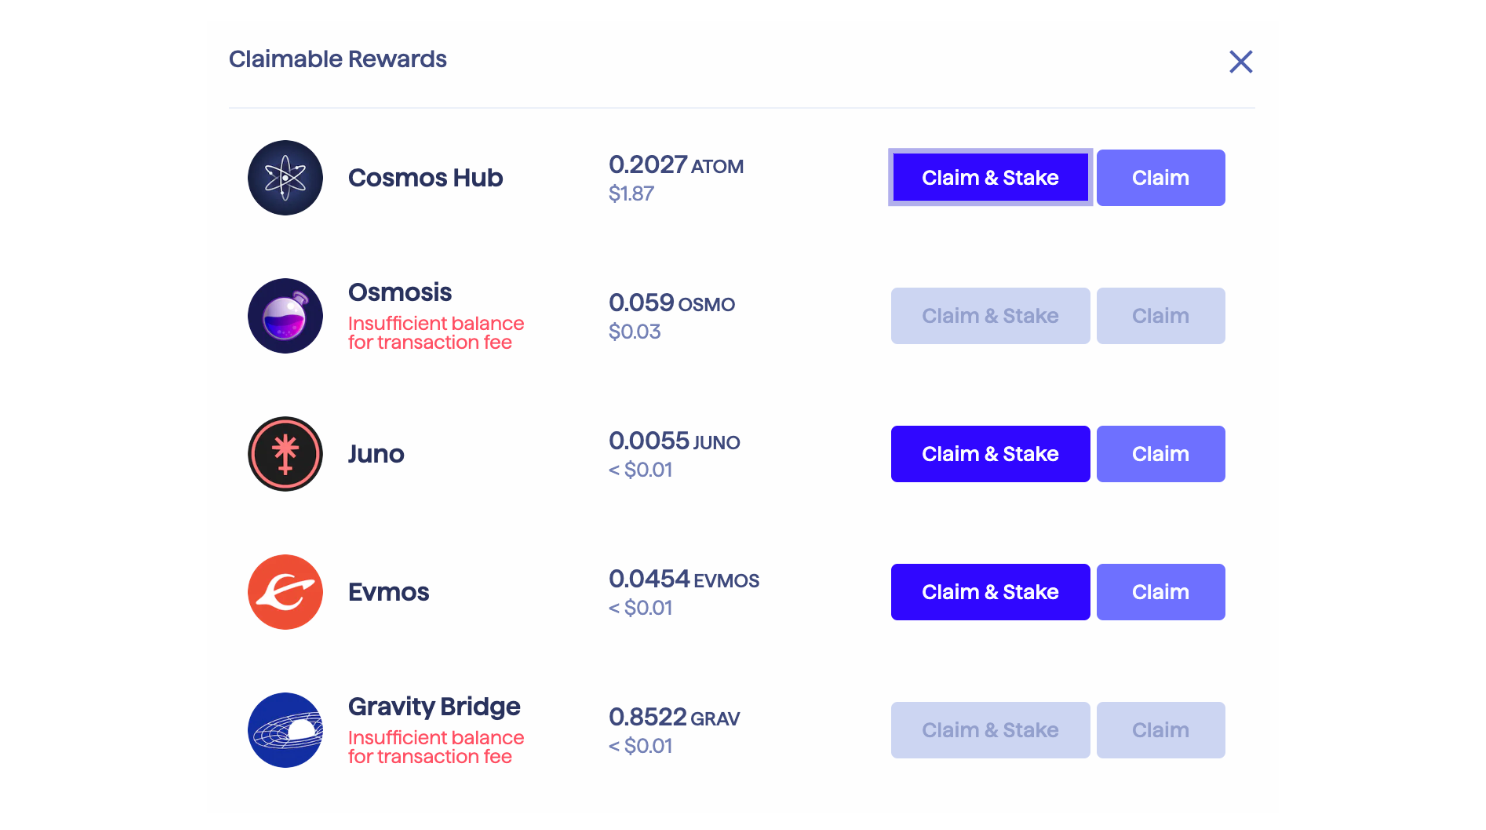
While you're on the staking tab in the Keplr dashboard, you'll see that on the top right there's a quick option to claim the "Total Claimable Staking Rewards". This option let's you claim all your rewards for the Cosmos Hub assets you're currently staking at once. To do so, select "Claim".
A pop-up will appear asking you to claim or claim and re-stake. Let's do claiming first. To claim, select "Claim" then approve the transaction via the pop-up. That's all. You've now claimed your assets and they will be available in your wallet.
However, if you'd like to earn more, you can also use claim & restake. To do so, select "Claim & Stake" and your assets will be restaked with your current validator(s). Approve the transaction in the pop-up to continue.
Part 5 - Governance voting
It's possible to vote on governance proposals for your favorite networks that you're HODL'ing assets from directly on Keplr.

As you can see, you're able to click and select all proposals that are open, and you can also select previous ones.
That's all folks! Happy staking everyone.
Part 6 - Tracking your staking rewards
There is a simple way to track your staking activity, across the Cosmos Hub but also across other Layer-1 solutions such as Solana, Polygon and Sui. The Stakin dashboard, which is non-custodial and only requires a public address, let's you track all your staked assets.
- Go to: https://dashboard.stakin.com/.
It’s free and only requires you to create an account and add your public wallet address. You can then track your staking activity and even generate and download staking reports as CSV files for several digital assets.
Feel free to reach out if you need any customizations or API access!
DISCLAIMER: This is not financial advice. Staking, delegation, and cryptocurrencies involve a high degree of risk, and there is always the possibility of loss, including the failure of all staked digital assets. Additionally, delegators are at risk of slashing in case of security or liveness faults on some protocols. We advise you to do your due diligence before choosing a validator.

Join the conversation