

Whether you’d like to stake with the Polkadot JS app or Ledger, here’s the step-by-step guide for you.
These days, $DOT is a well-known ticker and Polkadot a well established name in the blockchain space. The Polkadot network is a global network of interoperable chains, also known as a sharded blockchain, which refers to its ability to connect multiple blockchains to create a unified network of blockchain to process in parallel and exchange data with reliable security between chains.
Ultimately, Polkadot enables the creation of networks of blockchains. One chain does not fit all applications in the network of blockchains. You can have various chains, each with their characteristics and parameters adapted to the problem they are solving.
Polkadot is a Nominated Proof-of-Stake (NPoS) network designed with the roles of validators and nominators to optimize chain security. Before we get started with staking, here are some things to keep in mind when staking DOTs:
- Nomination period: any validator can share their intention to be a validator candidate, and they are made public to all nominators. Nominators, in turn, submit a list of any number of candidates they support. In the next epoch (one epoch is 4 hours), a certain number of validators having the most DOT backing get elected and become active. These validators are selected using Phragmen, for which you can read more about here.
- Slashing: Slashing will happen if a validator misbehaves — e.g., goes offline, attacks the network, or runs modified software in the network. They and their nominators will get slashed by losing a percentage of their staked DOT. Slashing is extremely rare, but it should be a reason good enough for nominators to conduct some due diligence before choosing their validators.
- Claiming Rewards: If you go to the staking payouts page on Polkadot-JS, you will see a list of all validators that you have nominated in the past 84 eras and for which you can claim a payout.
- Inflation: DOT is inflationary; there is no maximum number of DOT, and the supply will progressively increase over the years.
Staking DOTs with Polkadot.JS
First things first, if you don’t have any DOTs yet, you can acquire some by buying them on any exchange offering DOT trading pairs, such as Binance, Kraken, Huobi, and many more.
Please note: a minimum of 120 $DOT is required to be able to stake.
Step 1 — Making Sure You Are Connected
The fastest way to stake or nominate is through the Polkadot.JS web application available at https://polkadot.js.org/apps/#/explorer (see the dashboard below).
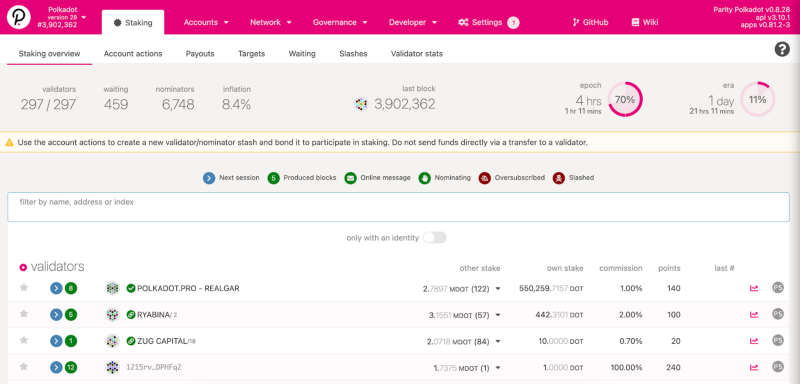
To get started, you will need to have the Polkadot.JS extension installed, as well as your wallet created. If you haven’t yet, you can find the instruction video for that below.
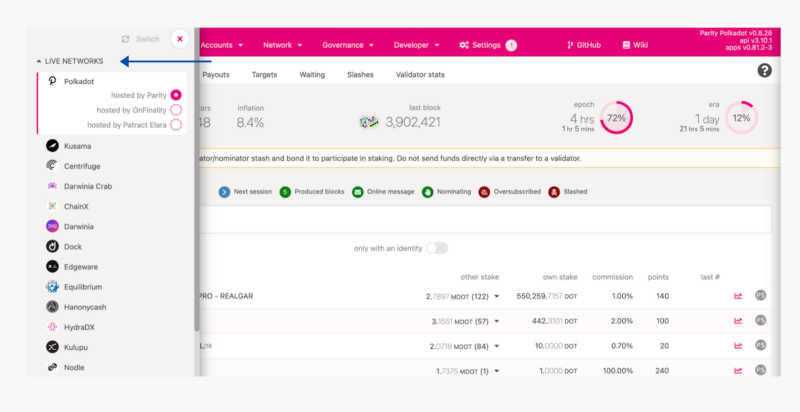
To then make sure you are connected to the Polkadot Mainnet, click on the top-left side menu and select the Polkadot network (see image below).
Step 2 — Bond Your Assets
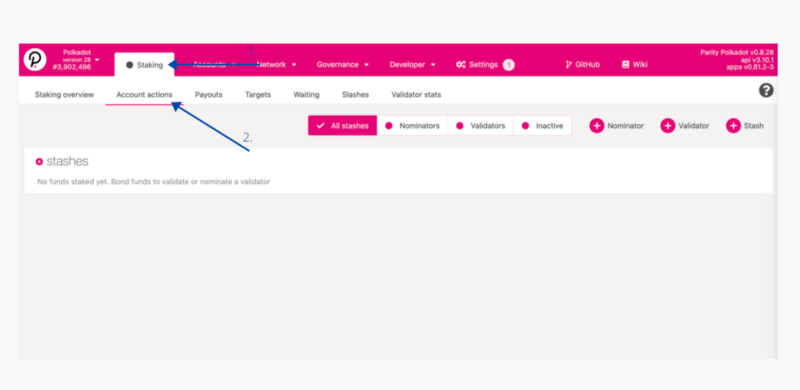
To start staking, click on the “Staking” tab and then select “Account Actions” (see image below).
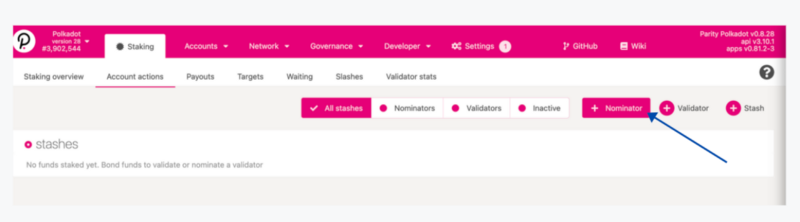
If this is your first time staking, click on the “+ Nominator” button on the right side of the screen.
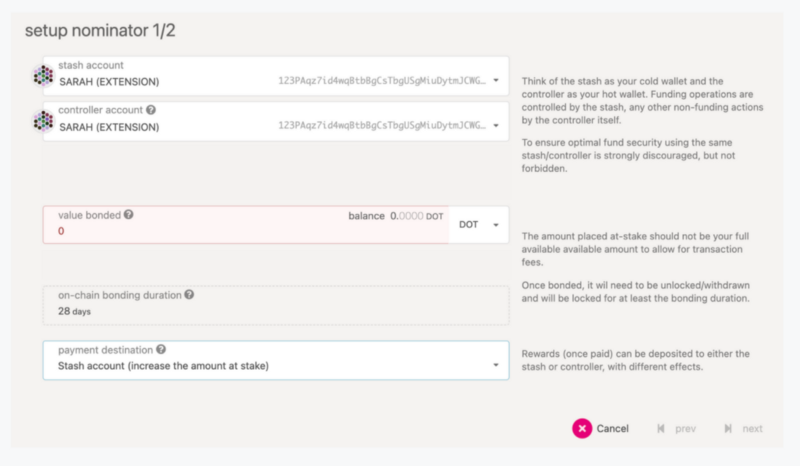
A pop-up will appear (see image below); on this pop-up, you will need to select your stash account, controller account (you may use the same one), and the amount you’d like to bond/stake.
Before you can nominate a validator, you have to bond your DOTs. Select a “value bonded” less than the amount of DOTs you own, so you leave some transaction fees. Transactions fees are dynamic, so it is essential to keep some DOTs as a back-up.

Step 3 — Staking/Nominating
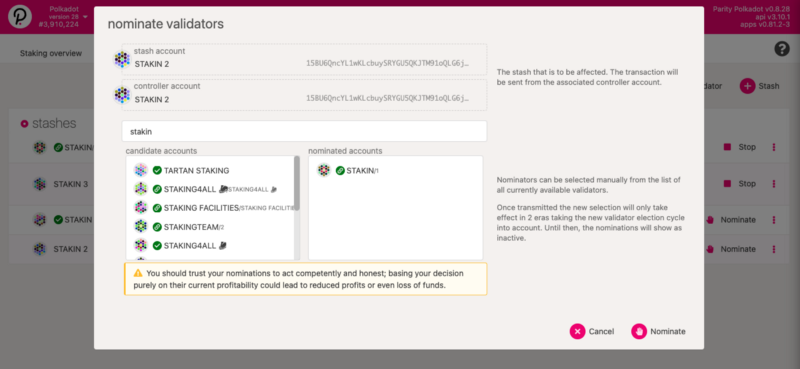
Once you’ve bonded your assets, it’s time to nominate your validators. It is possible to select up to 16 different nominators by selecting “next” in the pop-up (as seen above).
If you would like to support our activities as a validator, you can nominate us. Look for “Stakin” using the search bar. Our fees are 3% only.
Once selected, click on “bond & nominate” to continue. A pop-up will then ask you to confirm your transaction, and that’s it! You’ve now staked your assets!
Staking DOTs With Your Ledger Device
First things first, these are the things you’ll need before you can get started with staking your $DOT:
- In your Ledger Nano or X, make sure to have the latest version of Ledger Live for the best experience.
- Assure that you have a Chromium web browser so that you can use Ledger features on Polkadot-JS Apps.
Step 1 — Installing Polkadot On Your Ledger Application
Go to the Ledger Live App and select the “manager” tab on the left-side menu. Next, connect your Ledger to your computer and select “YES” on the device to give it access to the app.
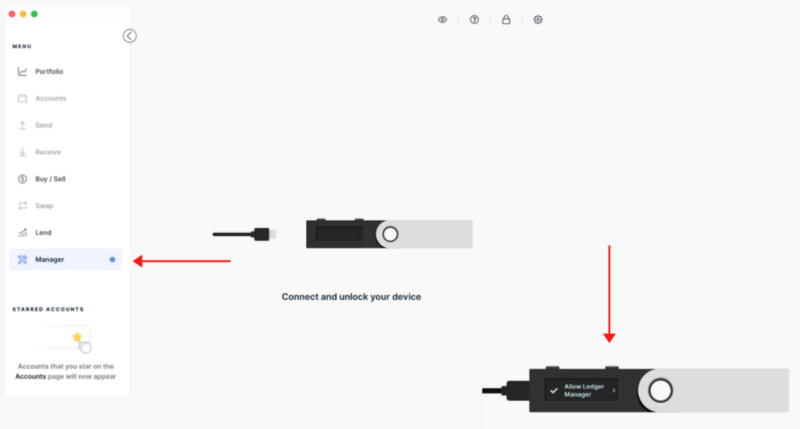
Once your Ledger is connected, an overview of all the device’s assets and apps will be shown. For the next step, go to the app catalog and fill in “Polkadot” to quickly find the app. Select “Install” on the right side of the screen.

Step 2 — Connecting To Polkadot-JS
Once you’ve downloaded the Polkadot app onto your Ledger, go to https://polkadot.js.org/apps/. To use Ledger with https://polkadot.js.org/apps/, you will need to be on a Chromium browser (Google Chrome, Edge).
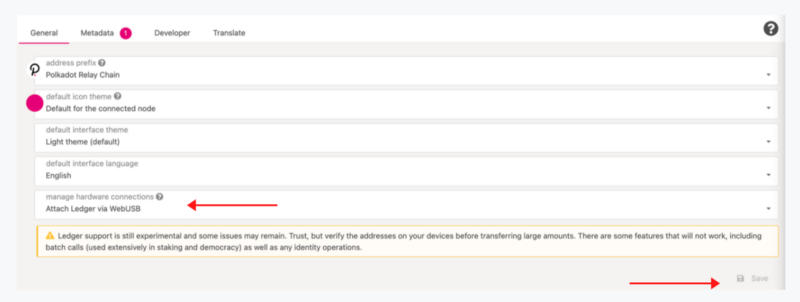
First, you’ll want to turn on the Ledger connectivity, select “settings” on the Polkadot-JS dashboard. Next, select “General”. In the drop-down menu on the bottom, select “Attach Ledger Via Web USB” (see image below). Once selected, press “Save & Reload” on the bottom right of the page.
Once reloaded, on the top menu, select “accounts” and then “accounts” once again in the drop-down menu.

For the next step, make sure your Ledger device is still connected and unlocked. In the accounts’ dashboard, select “Add via Ledger”.
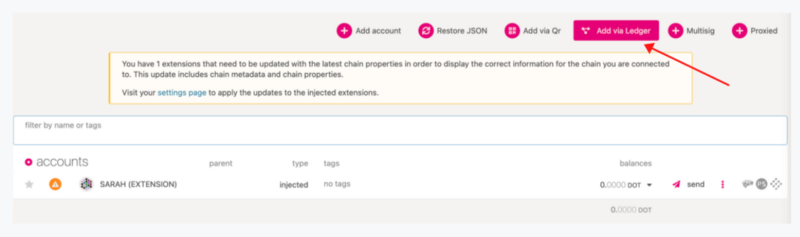
A pop-up will appear asking you for your account name, type, and index.
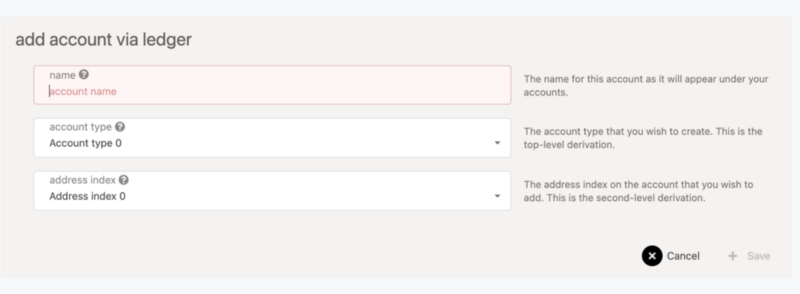
The account name lets you select a Ledger account. It is possible to have multiple accounts on one Ledger device. The second drop-down lets you pick a derivation path; if you’re unsure which one to select, we recommend choosing the first default option in the menu.
If you confirm your selection by pressing “+ Save”, you might be asked to confirm the USB connection through a pop-up (this depends on your browser and security settings). You should then be able to see the ledger account under the “accounts” tab. It will also show you the balance of your account.
Step 3 — Time To Stake!
Side note: because Ledger doesn’t allow batch transactions, you will have to do two transactions if you want to stake your $DOT using a Ledger device.
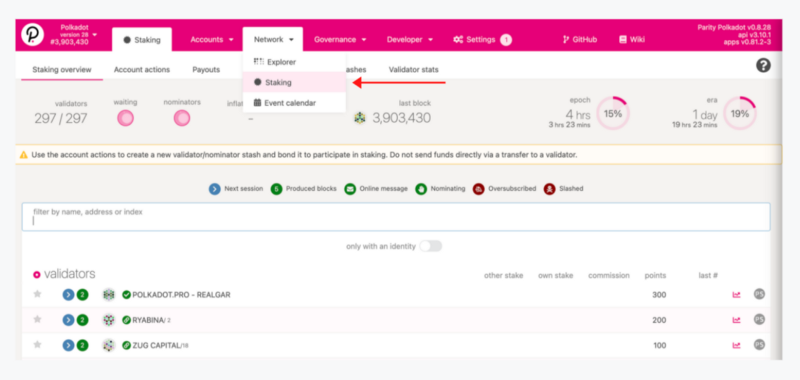
On the Polkadot-JS dashboard, select “Network” and then “Staking” in the drop-down menu (see image below).
Next, select “Account Actions” on the navigation dashboard. Select: “+ Stash” instead of the nominator or validator button and fill out the number of assets to bond, then confirm the transaction. And confirm the transaction once again on the Ledger device.
Once the transaction is included, you will see the bonded account on the “Account Actions” page. Then select “+ nominate” to stake your assets and confirm the transaction on your Ledger device once again.
Congratulations! You’ve now staked your $DOT!
DISCLAIMER: This is not financial advice. Staking, delegation, and cryptocurrencies involve a high degree of risk, and there is always the possibility of loss, including the failure of all staked digital assets. Additionally, delegators are at risk of slashing in case of security or liveness faults on some protocols. We advise you to do your due diligence before choosing a validator.
Join the conversation