
Looking to auto-compound your Cosmos Hub digital assets? Have a look at this step-by-step guide.
If you’re part of the Cosmos ecosystem and are interested in staking and earning passive rewards from your digital assets, you might want to have a look at auto-compounding. Auto-compounding refers to the process of no longer having to manually claim and restake your staking rewards. Here instead, you let a DApp automatically restake for you, with the aim of maximizing your APY. For the Cosmos ecosystem, you can utilize a platform called Restake built by Eco Stake, which you can access via https://restake.app/. In this article, we’ll show you exactly how to use it.
So, without further ado. Let’s stake! First, make sure that you have Keplr wallet extension installed. On the dashboard (see image below), select the asset that you’d like to re-stake by entering the name into the search balk. In this case, we’ll be using Evmos.
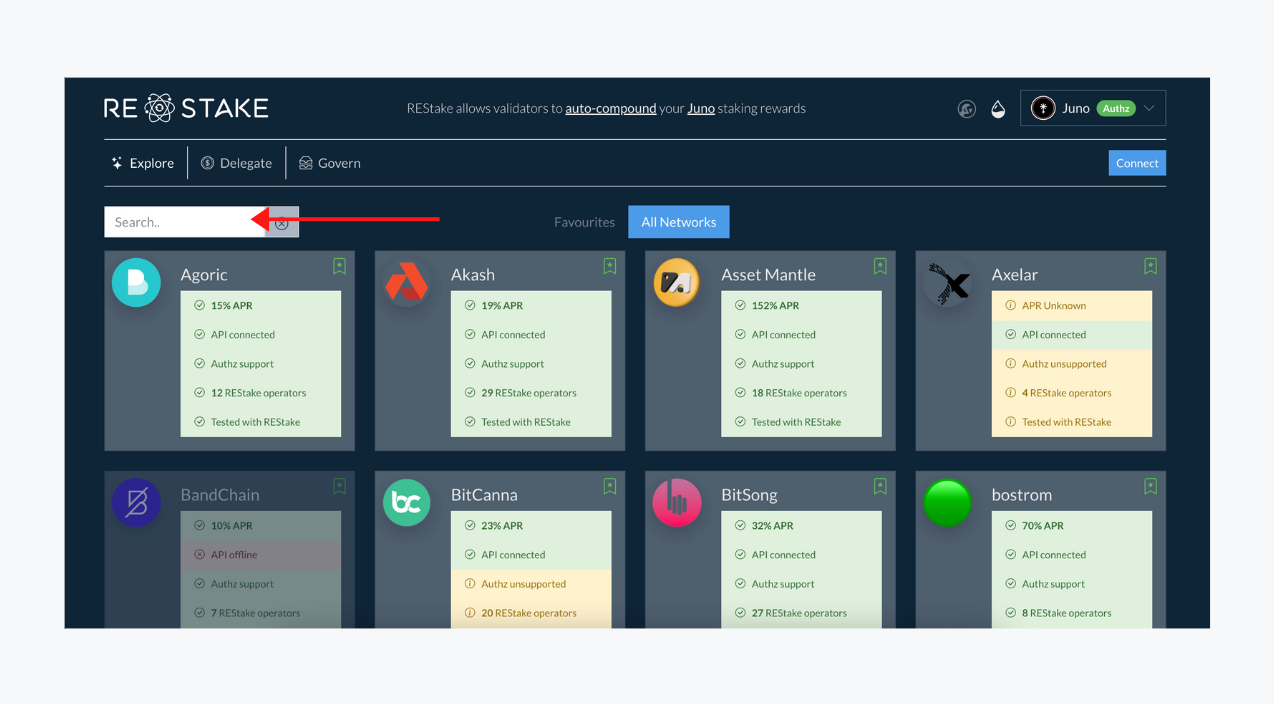
Click on the network of your choice, and the list of available validators will appear. Now, before you can continue. Select “Connect” in the top-right corner of your screen to connect with your Keplr Wallet. Please note: since the re-stake DApp is created for Cosmos, you are currently unable to stake your Evmos using MetaMask via this platform.
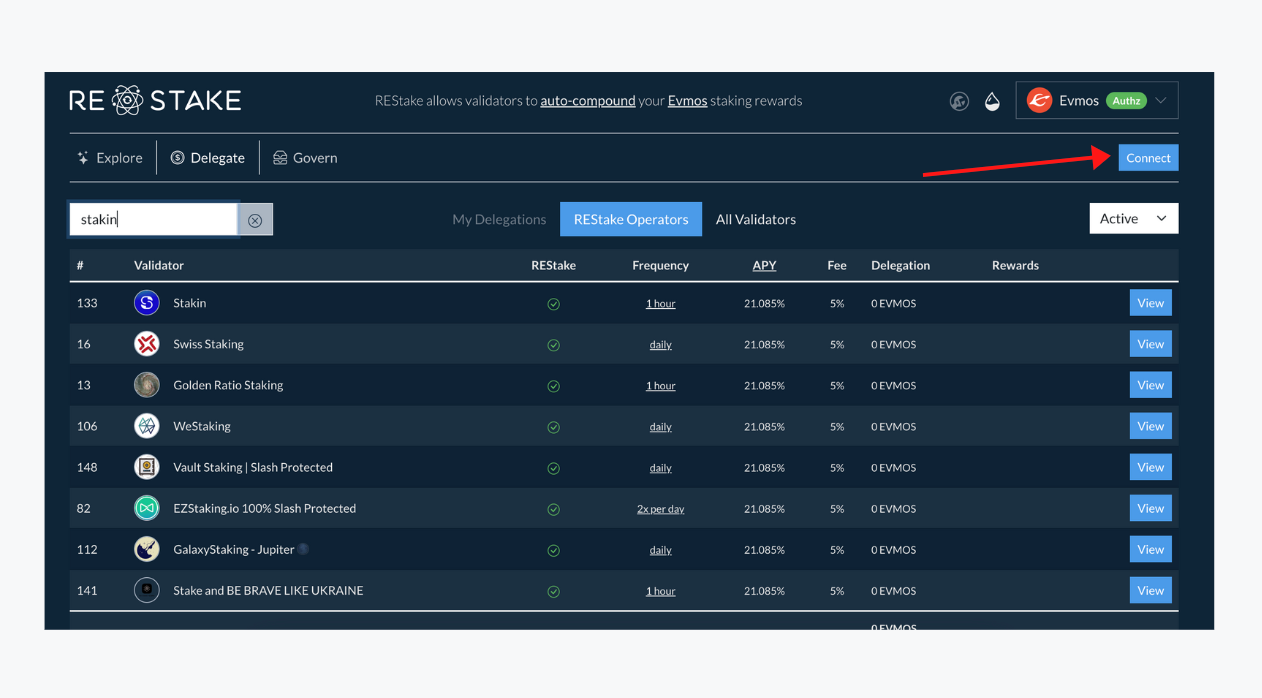
Once you’ve selected connect, a pop-up window will appear requesting you to allow Keplr Wallet access to the platform.
If successful, you should see a screen similar to the one below. Please note: enabling REStake will authorize the validator to send delegate transactions on your behalf for 1 year using Authz. They will only be authorized to delegate to their validator. You can revoke the authorization at any time, and everything is open source.
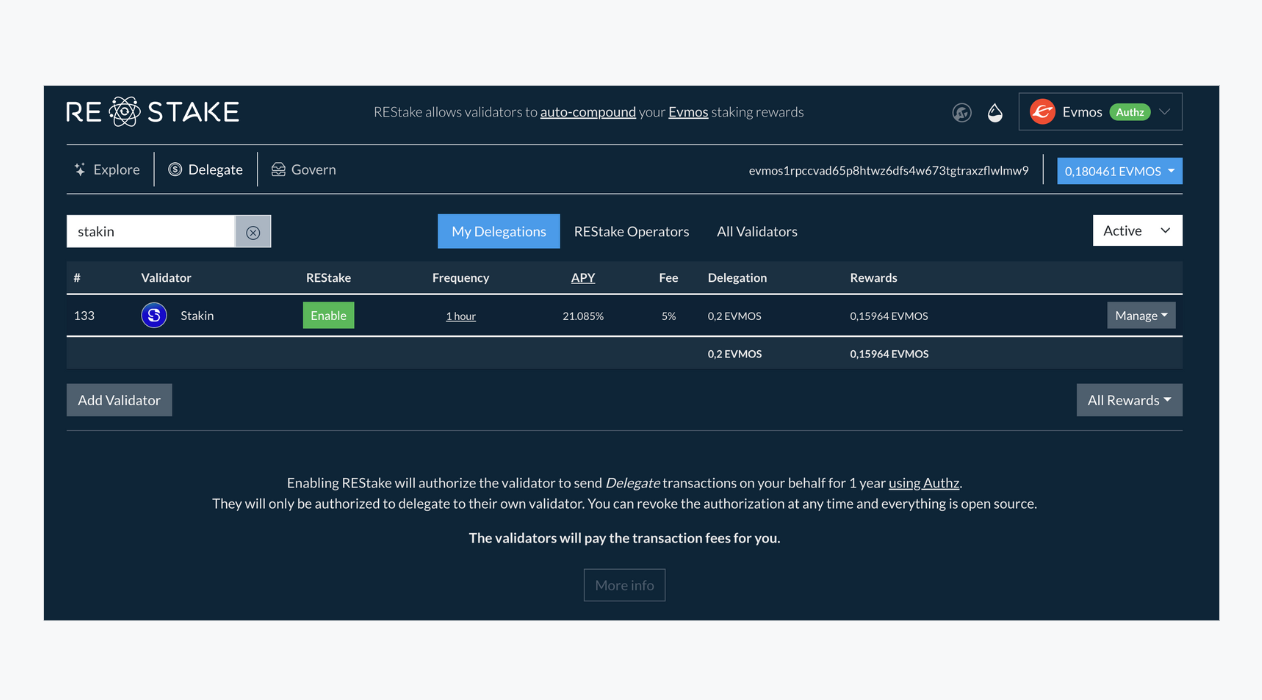
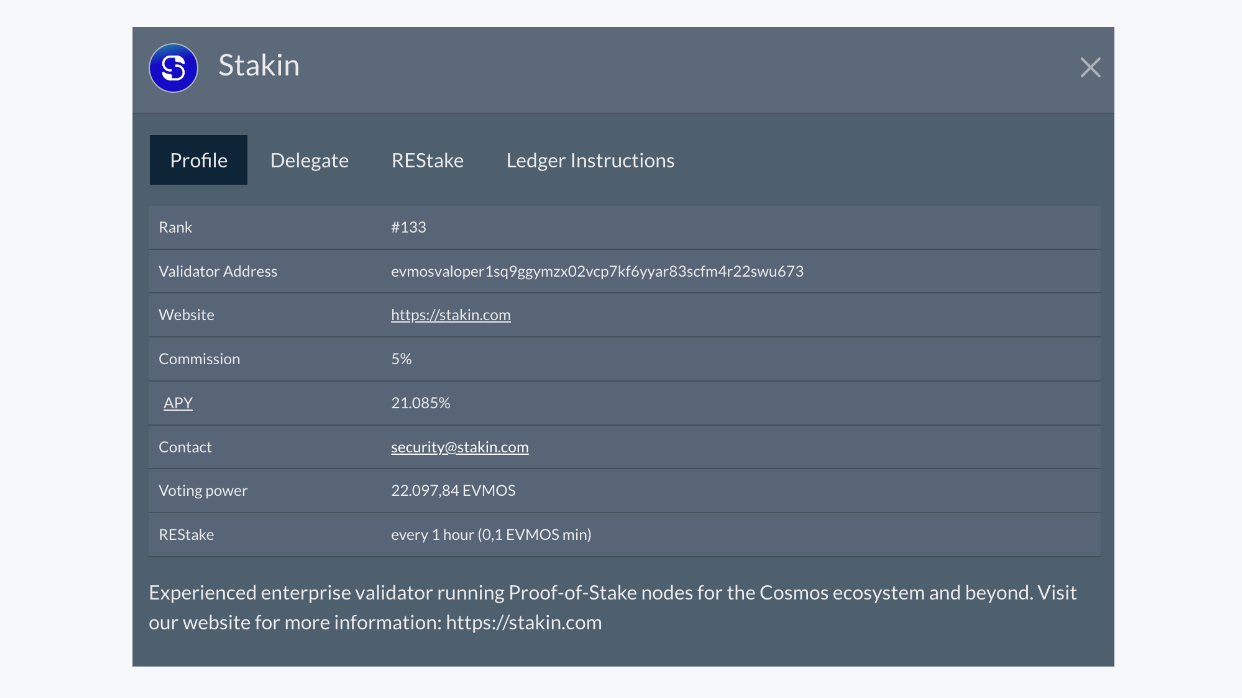
Next, select “Enable” on the right side of the validator's name. A pop-up will appear with four tabs. First, the validator’s profile, illustrating their website, address, commission rate, APY, voting power, and more. Then there’s the delegate tab, REstake tab, and the ledger instructions.
If you haven’t staked at all yet. Select “delegate”.
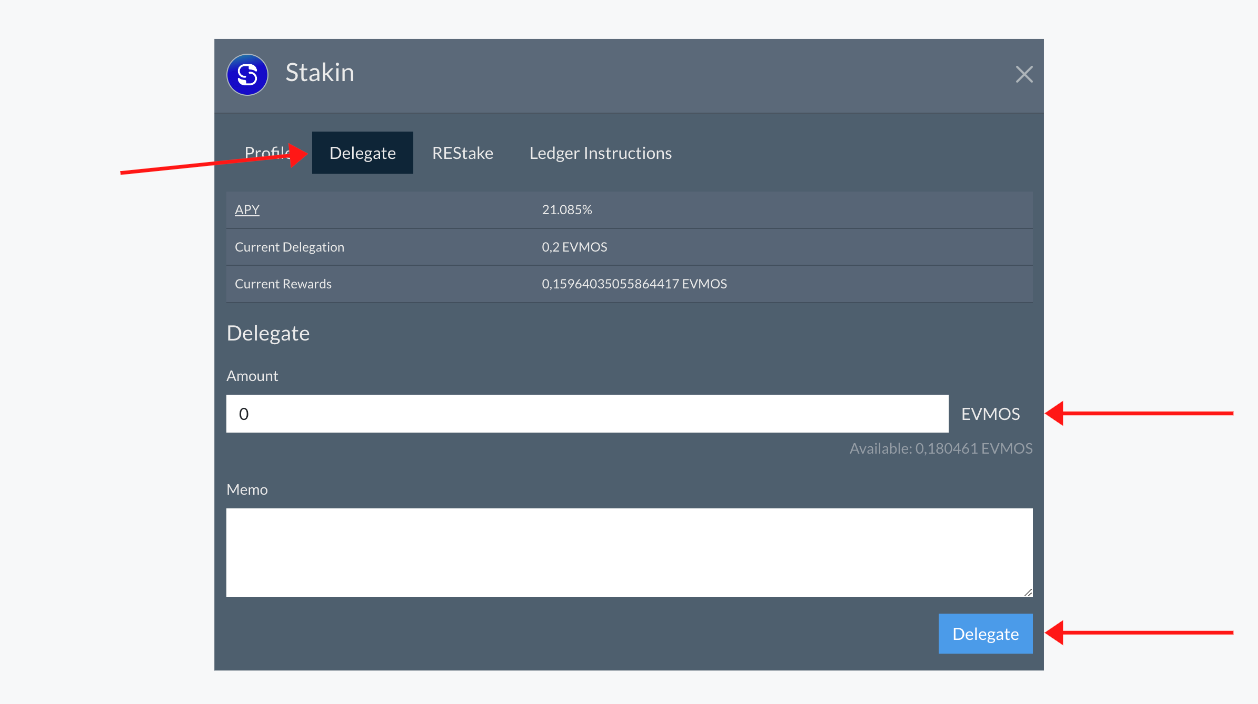
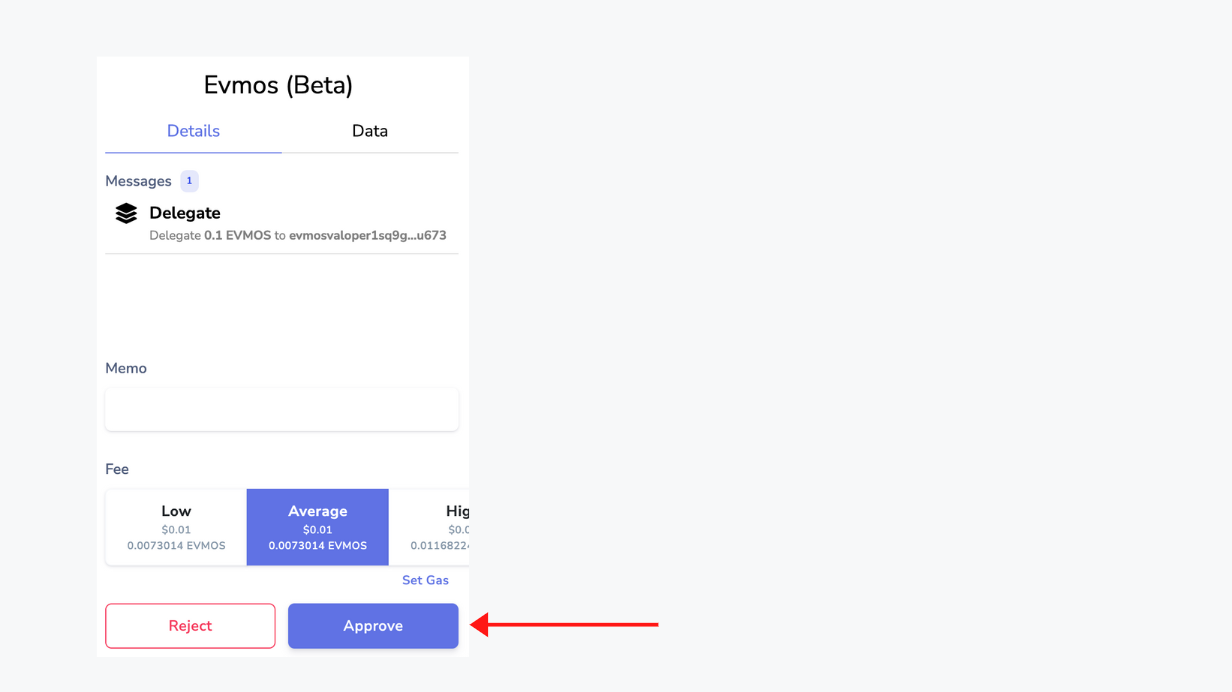
Fill out the amount of Evmos that you’d like to stake, and leave a memo if you’d like to. Then select “Delegate”. A pop-up of Keplr Wallet will appear, asking you to confirm the transaction. Please make sure to double-check all information before selecting “Approve”.
Wait a few seconds and your transaction will appear on the screen with the validator of your choice. Now, select “Enable” once more. But this time, to continue, select “Restake”.

As seen in the image above, you can now set a max. amount that you’d like to automatically restake as well as the expiry date. Select the option of your choice and when ready, select “Enable REstake”.
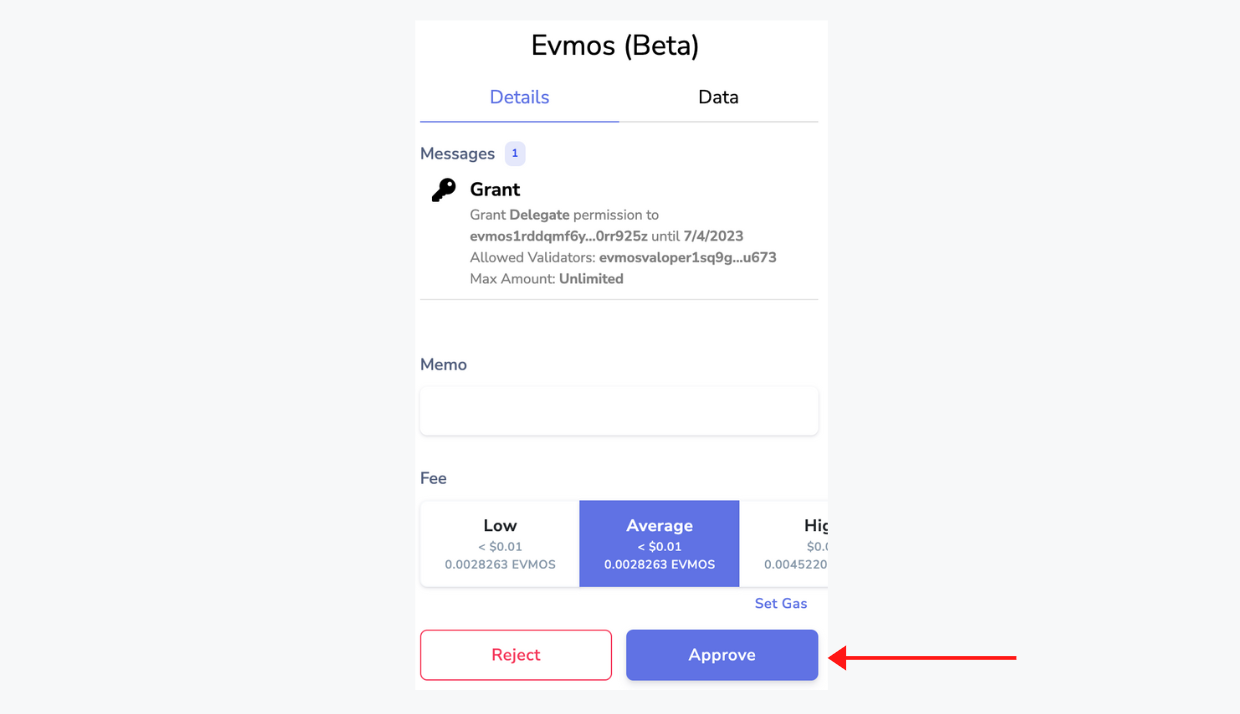
Approve the transaction once more & that’s it! You’ve now successfully given your validator restake permission, and you are ready to sit back and relax, but still earn your rewards.
Keep in mind that it’s possible to undelegate, and ungrant by simply selecting “manage” on the right side of the validator’s name and selecting “disable restake”. Normal unbonding mechanisms do apply.
DISCLAIMER: This is not financial advice. Staking, delegation, and cryptocurrencies involve a high degree of risk, and there is always the possibility of loss, including the failure of all staked digital assets. Additionally, delegators are at risk of slashing in case of security or liveness faults on some protocols. We advise you to do your due diligence before choosing a validator.

Join the conversation