Hi Readers👩💻,
Last time we took a look at staking Solana SOL with the Solflare wallet by using the Keystore. In this article, we’re bringing you step-by-step through staking SOL with the Solflare Wallet by using the Ledger Nano.
The SolFlare Wallet
Dokia Capital created the SolFlare wallet, and it is the first-ever digital wallet created explicitly for the Solana Network. Enabling you to send, receive, and stake SOL. The staking process used to require the use of a command-line interface, but with SolFlare, it is a natural and flowing experience that makes it easier for anyone to do so.
The wallet has an integration option with the Ledger Nano S hardware wallet; however, it is working on adding multiple other hardware and CLI wallets in the future.
🚀 Let’s Start Staking
Step 1 — Create Your Wallet
First, before we start with staking, you’ll have to download and set up your wallet. You can choose to create a wallet with a Keystore file, or with a Ledger hardware wallet. In this tutorial, we’re using the Ledger Hardware wallet. For security reasons, we recommend using a Ledger. To check out the Keystore version, click here.
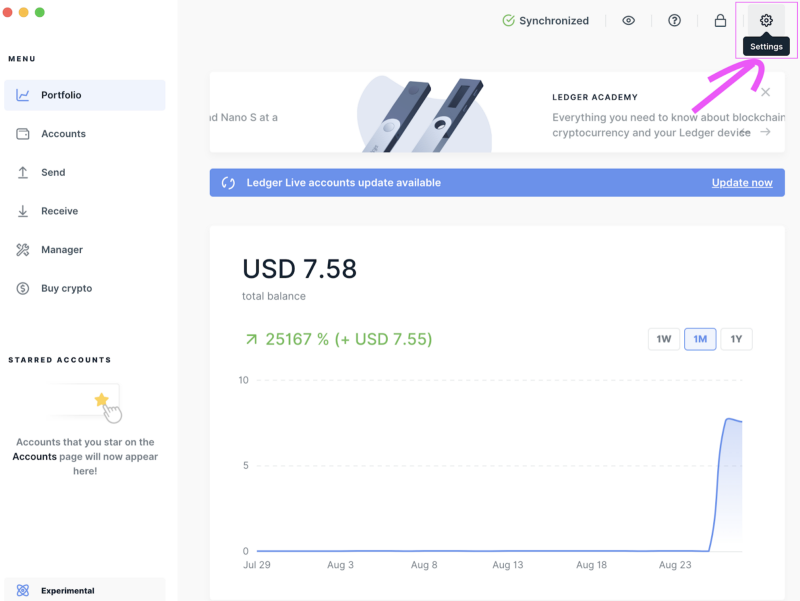
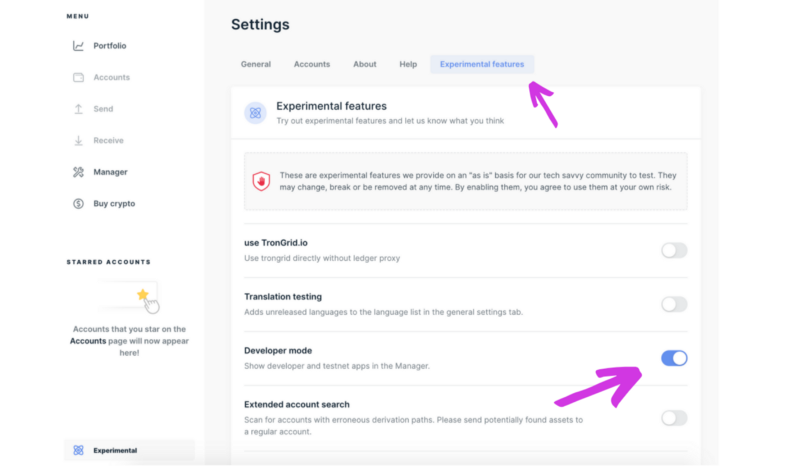
First, go to the Ledger Live app and select “Settings” and then turn on the “experimental features — developer mode” (see images below).
Now, goto the “Manager” page and search for “Solana”, then press “Install”.
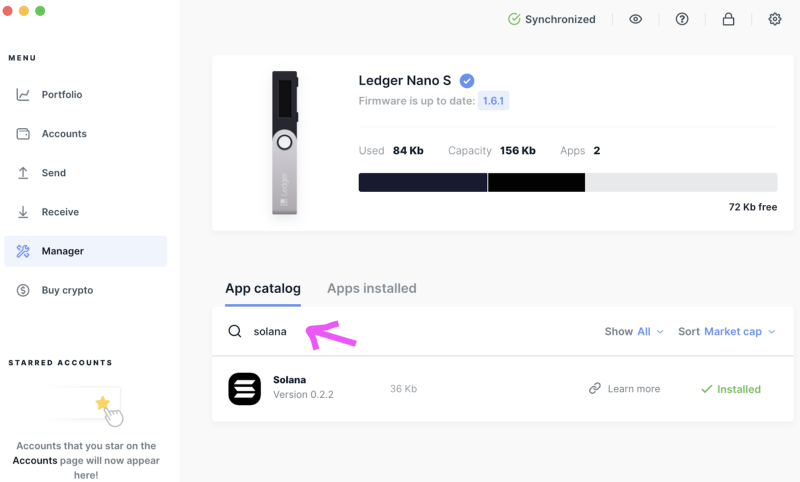
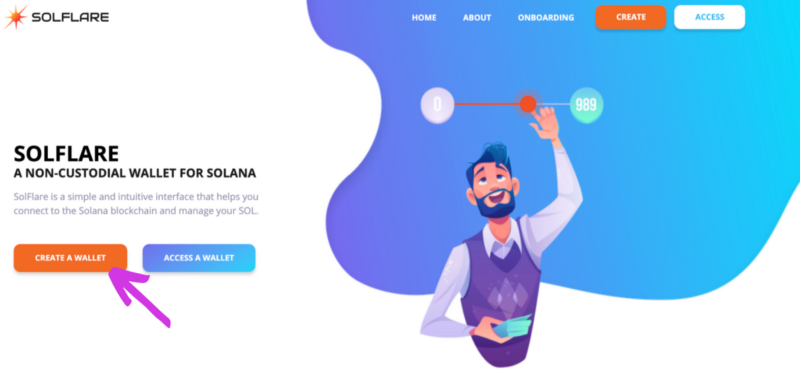
After you installed the Solana app on your Ledger Nano S, you can go to Solflare.com and click on “Create a wallet” on the Menu or “Access a wallet”.
Read through the given guidelines. Afterward, you’ll see the screen asking to change to “Using Ledger Nano S” and click on “Access Wallet”.
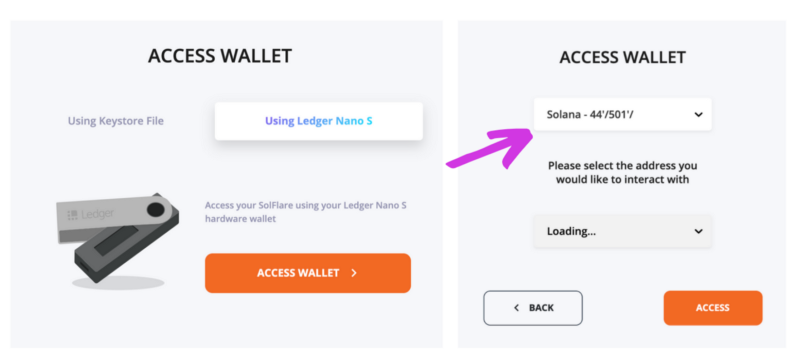
Fill in your PIN code on your Ledger device, and then select “Next”.
After selecting “Next” a new pop-up will appear, asking you to choose the Ledger you like to use. Select your choice and press “Next” again. Select the wallet you’d like to start staking with and select “Access”.
Step 2 — Access Your Wallet
Now that you’ve created your wallet, it’s time to get some SOL in there to start staking. The wallet interface will open, showing you your public address, the amount of SOL you have in your wallet, a “transfer SOL” button. You can switch between dark-mode and light-mode. Furthermore, it is possible to switch between the Mainnet and Testnets.
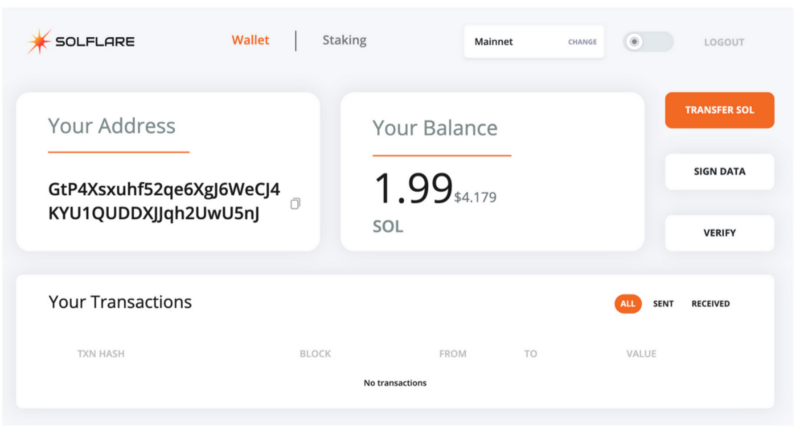
Now select copy/paste your address. Once your funds have arrived, it’s time for the next step.
Step 3 — Creating a Stake Account
Within the Solana network, staking works slightly differently and is a bit more complicated than traditional Proof-of-Stake networks. If you want to find out more about Solana, click here.

Click on “Staking” in the upper menu, then scroll down on the interface, and select “Get Started”; this will open up a pop-up that asks you how much SOL you’d like to deposit. Fill out whichever amount you’d like to use. Make sure not to apply all funds, since you still need some for transaction purposes (gas, fees). Use your Ledger to verify the amount and address which you want to fund the staking account.
Now on your Ledger navigate and verify the data like amount, address from which the staking account will be funded, etc. by using the right button until you see “Approve” and then press both buttons simultaneously to confirm. Once confirmed you will receive your staking account address, and you can press “finish”.
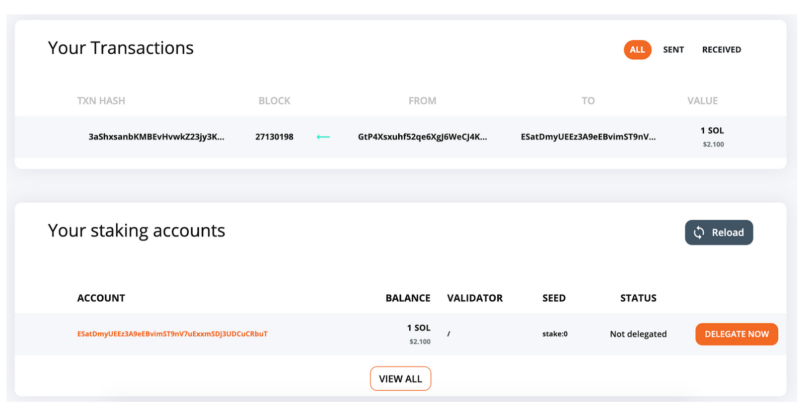
When your staking account is funded, you can start delegating to a validator. Click on the “delegate now” button to get started.
Step 4 — Time to Start Staking!
With your SOL moved to your staking account, scroll up on the interface to select “staking”. The staking interface will open, showing you your balance on your staking account, your normal balance on your wallet, and the validators you can delegate. Select “delegate now”.
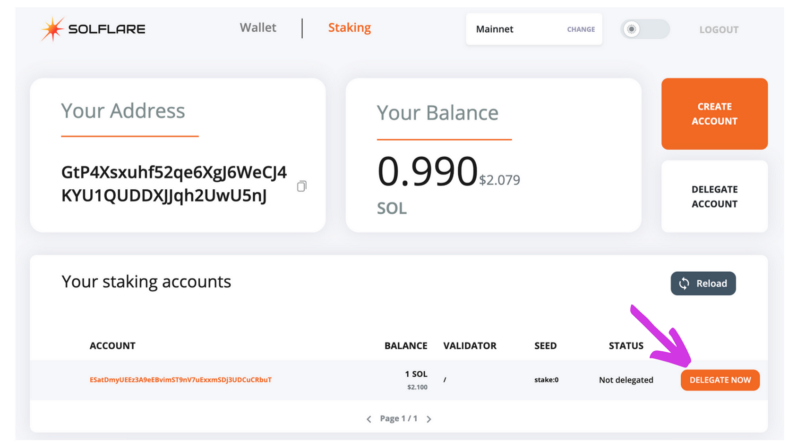
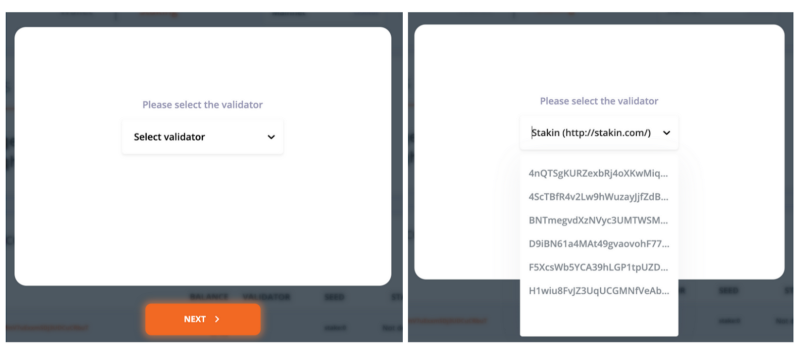
A pop-up will appear, where you can select the validator you’d like to delegate your assets to. Use the search option to find your validator by name quickly. Afterward, use your Ledger to verify and confirm your delegation by navigating with the right button until you see “approve” once again. Press both buttons at the same time to confirm.
If you like our article and want to support our activities within the Solana ecosystem, select Stakin as your validator. We’re currently running at 0% until inflation is enabled!
Step 5 — Completed!
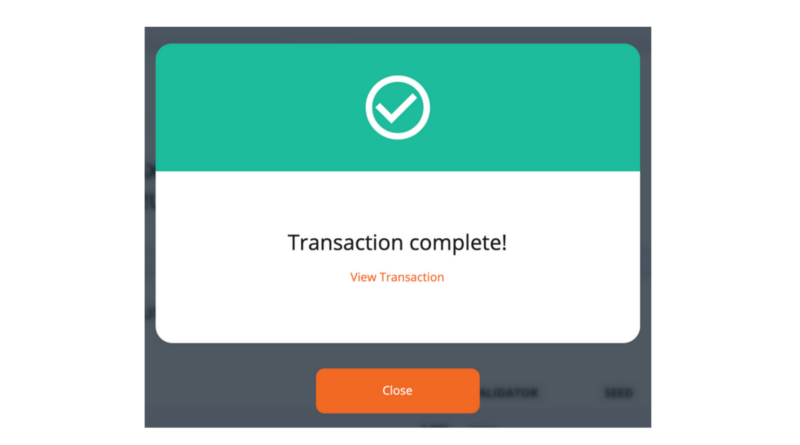
A pop-up will appear that says “transaction complete”. It is essential to remember that it will take around 45–50 minutes for the changes to show up on your interface. You can check your transaction on Solana beach. And that’s it! You’ve now staked your SOL assets.
More Information & Sources
DISCLAIMER: This is not financial advice. Staking, delegation, and cryptocurrencies involve a high degree of risk, and there is always the possibility of loss, including the loss of all staked digital assets. Additionally, delegators are at risk of slashing in case of security or liveness faults on some protocols. We advise you to do your due diligence before choosing a validator.
