

A step-by-step guide on using Orbit Bridge with ICON network
Hi Iconists🧑🚀,
It has been a while since we shared an article about the ICON Project or one of its implementations, which is why today we are sharing a step-by-step guide on using the Orbit Bridge with $ICX. But first, before we go into the directory, let’s have a look at what the Orbit Bridge is.
🧐 Orbit Bridge Explained
Last year, OrbitChain introduced the Orbit Bridge: the worlds’ first decentralized open IBC platform. And a few months later, in December 2020, the ICON network’s announced that they would integrate the bridge.
Orbit Bridge is a decentralized Inter-Blockchain Communication (IBC) platform. IBC is a technology that makes it possible to communicate between heterogeneous blockchains. As more and more new blockchains emerge and more DApps are developed, the need for IBC becomes even more evident. Through the interoperability protocol, ICON will expand its DeFi capabilities as they can connect with top blockchains and their applications.
The integration gets its value from bridging assets between different blockchains and bringing more economic activity to the ICON Network. Orbit Bridge IBC was built using multi-signature BFT consensus to establish a decentralized, trustless consensus process.
The main features that the Orbit Bridge brings are:
- Sending cross-chain data between heterogeneous chains.
- Send assets or data to any chain connected to Orbit Bridge.
- Smart contract-based consensus process that happens on-chain and goes through Orbit Chain.
- Trustless, secure multiple-signature verification.
Ricky Dodds, Strategy and Communications Lead at ICON, said the following about the integration: “The Orbit Bridge integration is an exciting next step for the growth of the ICON DeFi ecosystem, and we look forward to bringing this technology to the community”.
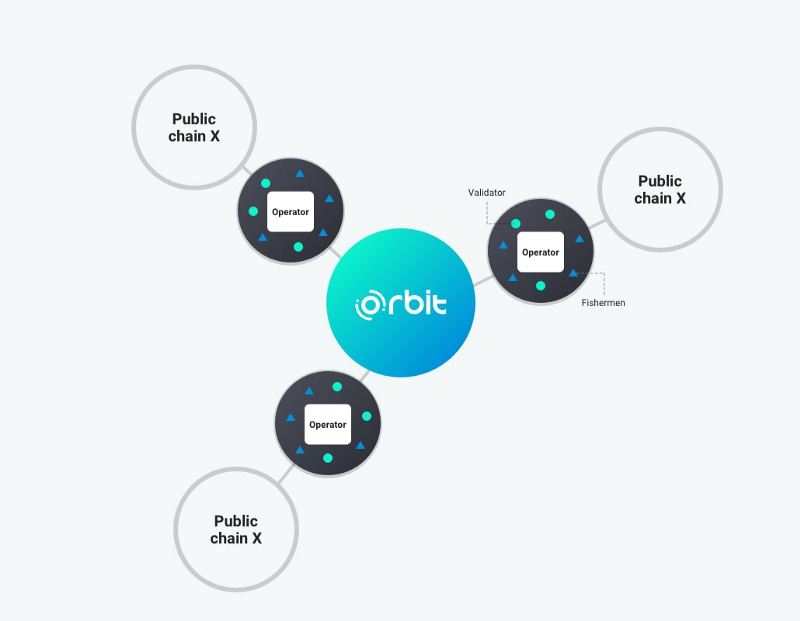
So, that is all super exciting, but how does the Orbit Bridge work? The Orbit Bridge system has Governance groups for the following roles: Operator and Validator. Bridging protocols can use an MPC-based transaction or Multi-sig based transaction consensus method (in ICON’s case, the latter), and Orbit Bridge uses Multi-sig based transaction consensus. The Operator who sends data and the Validator work together efficiently to process transactions quickly.
Furthermore, as the consensus and validation processes happen through transactions on Orbit Chain, they are transparent and trustless. Validators can use a separate private channel and blockchain to complete their tasks.
💻 Guide To Using The Orbit Bridge With $ICX
Step 1 — Get Started
Before getting started, go to https://bridge.orbitchain.io/ and click on: “Select Coin” (see image below).
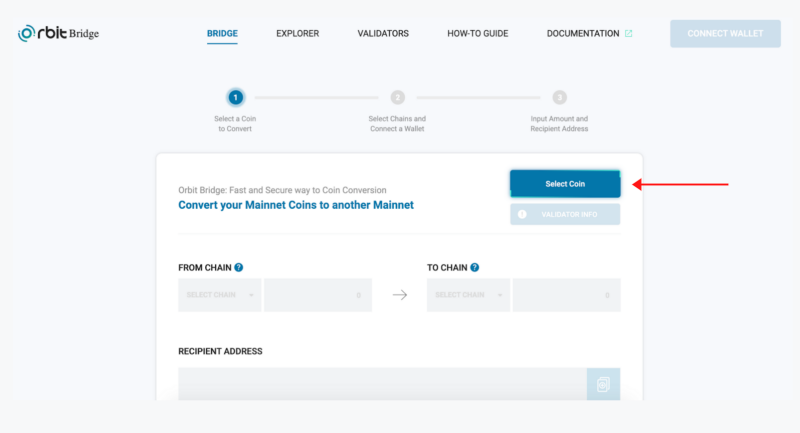
For this example, we’re selecting ETH. Click on the digital asset you’d like to convert or choose manually using the search balk on top of the pop-up. Once selected, click “OK”.
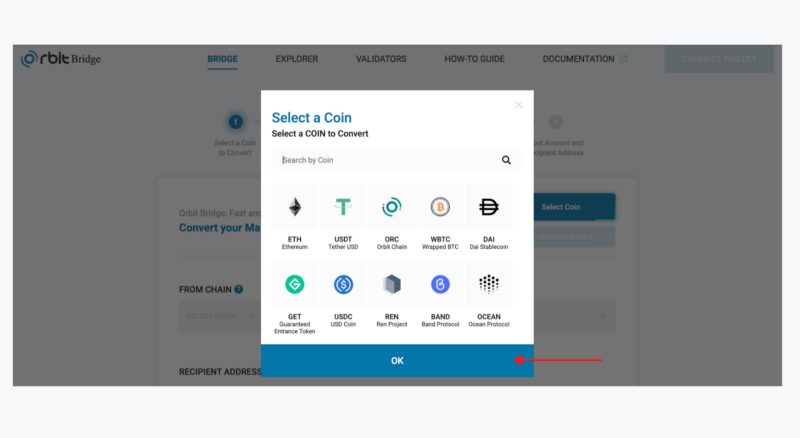
Side note: by selecting ETH you do not limit yourself to converting ETH to ICX. Please continue to further steps to see how you can change ICX for ETH.
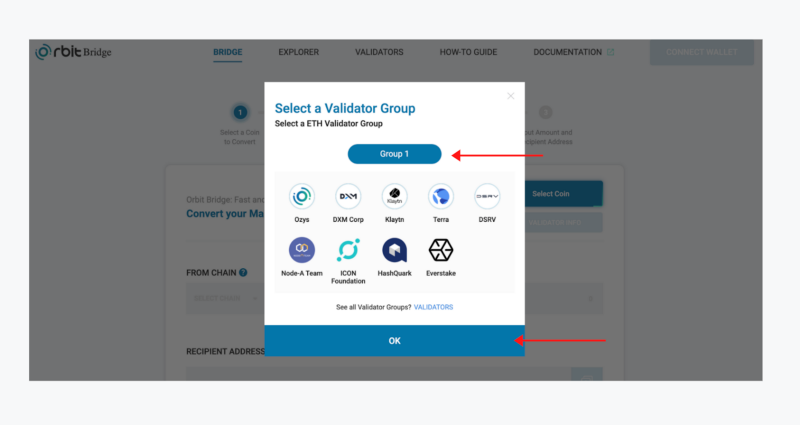
Next, select a validator group (in this case, “Group 1”) and select “OK” once again.
You will then be invited to select the chain from which you wish to transfer the assets: FROM CHAIN, and the ones on which you would like to receive these: ON CHAIN.
For example, if you want to transfer assets from the Ethereum network to ICON, you would select FROM Ethereum and be prompted to open your MetaMask wallet.
In case you are transferring assets from ICON to another blockchain, you will be asked to connect your $ICX ICONex wallet. If you don’t have one yet, go to the tutorial on downloading and transferring $ICX with ICONex, here.
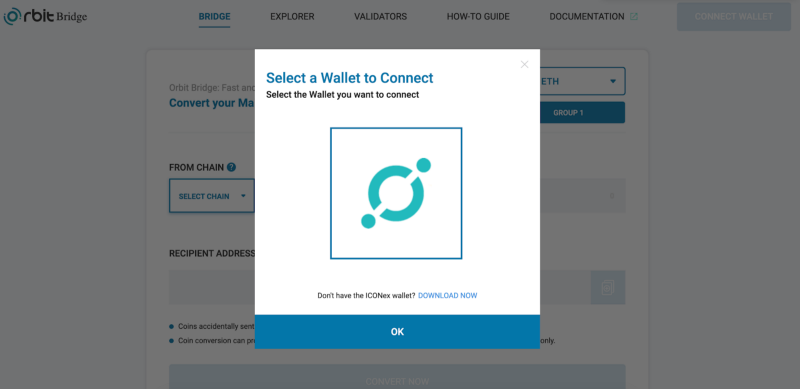
Once selected, click “OK”. A pop-up will appear asking you to confirm the connection between Orbit and ICONex, select “Confirm”. If successful, a message will let you know, select “OK” to continue.
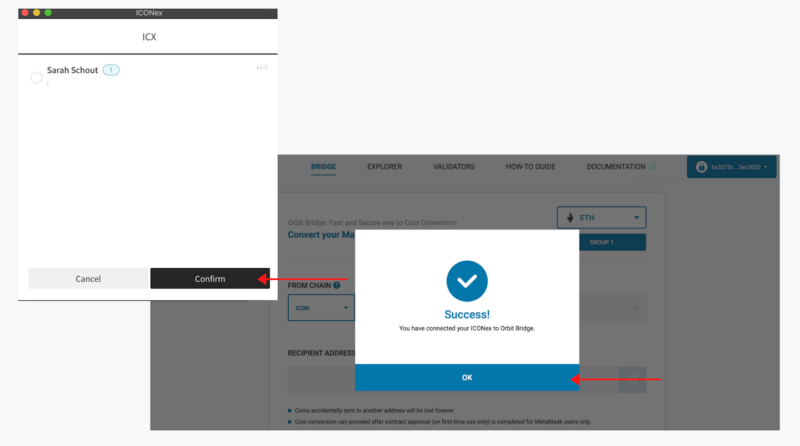
You have now connected your wallet, a screen similar to the one below should now appear.
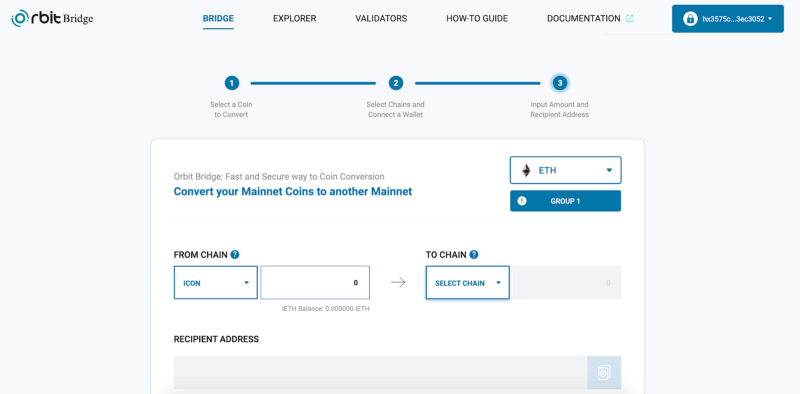
Step 2 — Converting Your Assets
Now that you’ve connected your wallet, you can convert your assets. On the left side of the dashboard, under “From Chain”, select the asset you’d like to convert.
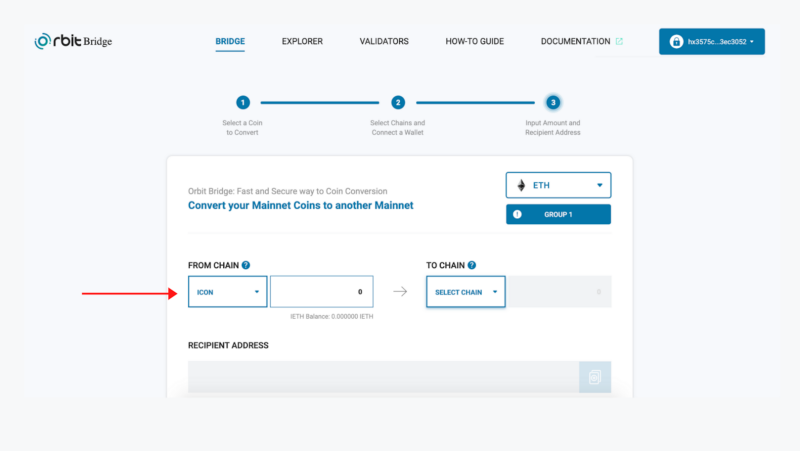
It is possible to select: Ethereum, ICON, or KLAYTN. Next, fill in the amount that you’d like to transfer, and enter your recipient address. Let’s say you want to convert $ICX 5 to Ethereum; add this in the empty box. The value will automatically be filled out in the receiving chain box. Now, fill out your Ethereum receiving address.
Side note: please keep in mind that it is possible that sending your ETH to an external address can create an internal tx in the Ethereum blockchain, which will put your assets at risk.
Select “Convert Now,” and a pop-up will give you an overview of the transaction and ask you to “Confirm”.
Congratulations! You have now converted your assets🙌.
DISCLAIMER: The pegged tokens have no uses — yet. Keep an eye out for the upcoming DApps like lending, AMMs, farming pools, etc.
DISCLAIMER: This is not financial advice. Staking, delegation, and cryptocurrencies involve a high degree of risk, and there is always the possibility of loss, including the failure of all staked digital assets. Additionally, delegators are at risk of slashing in case of security or liveness faults on some protocols. We advise you to do your due diligence before choosing a validator.
Join the conversation